This is the card I made for a crafting friend, Cassidy. To help us theme her cards we were told she liked dolphins, cats, hedgehogs, pink and purple. (There were probably more but they've escaped me!).
I had a mass panic as I don't have anything to do with ANY of those lovely creatures - except my own gorgeous cat Frankie (featured to your left!) - I certainly wouldn't plaster him with Distress Ink and glimmer mists as he's beautiful enough already!
I then heard that Cassidy likes anything quirky and I know she uses the dreaded 'cogs and gears' in some of her work. I say dreaded because I don't 'get' them at all!! I like what other people do with them but they always make me want to ask 'Why???'.
To cut a long story short, I found an inexpensive embossing folder and some very attractive stamps with cog filled flowers - even I liked those! The following pictures will show you what I came up and I was quite pleased with the finished result. I wanted to make it slightly wacky and unlike anything I've ever produced before. Did I succeed? You'll have to decide on that one.
I used loads of cosmic glimmer mist in various shades to pick out the texture of the embossed 'cogs'. I thought I would show this piece for the challenge at
The Sunday Stamper.
 |
| The completed card - the image is a little dark and doesn't give a clear view of the shimmering colours but hopefully you get the idea! |
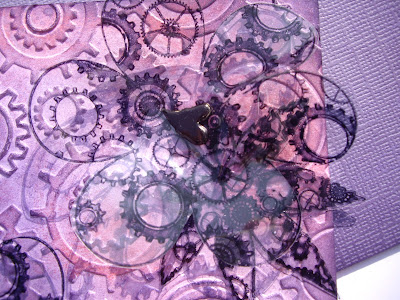
This image shows a close up of one of the flowers I made from acetate. I stamped the image using Stazon and cut out the flowers and leaves when they were dry. I secured the flowers using heart shaped brads which I coloured with permanent marker pen - I don't have any alcohol inks for that : ( !
Here you can see one of the acetate flowers before I secured it to the card. I shaped it by using a heat gun and pushing the softened flower into a pencil sharpener lid! A tricky business and one of my flowers shrank to the size used in a doll's house because the gun was too hot!
You can also see the inner layer of the card which I stamped with Distress Ink and water to soften the image.
The black and lightly coloured layer in the left corner is the main background layer of the card. I also used a piece of sanded and inked C'oredinations card.
 |
| In this image you can see the layers of the card more clearly. The lettering is of course a TH die. I inked each letter and sprayed loads of shimmery mist over them. With a final coat of glossy accents they looked as if they'd been painted with pearly nail varnish! |