Thursday 18 June 2015

Drawers. . . . . . . . By Tando Creative!

Good morning everyone. It's my turn to share one of our wonderfully generous sponsors in the spotlight over at Our Creative Corner. Here's a sneak peek of my project:

A little rust and lots of crackle - of course!
The clue is in the title of course! I'd love it if you popped over to Our Creative Corner and had a look at the full project.


Thursday 4 June 2015

Small Is Beautiful. . . . .


Good morning everyone. Today sees a new challenge at Stamps & Stencils and it's my turn to host this month. Here's what I've set as my challenge:

'For this challenge you are asked to make or alter something small. This could be a tiny book or journal, an ATC or ATB, a small canvas or box/tin of similar size' a piece of jewellery - anything as long as it is small.You must use at least one stamp and one stencil on your project. Please remember we are a mixed media challenge blog and the style of your work should reflect this.'

Here's what I made for this challenge:

A small ATC sized mini journal. 

The back cover which uses the same image in different colour palette.
The pages inside are altered Gelli Plate prints which are ready for journalling.
Mount board has been used to strengthen the ATC's. The edges of all pages have been finished with ColorArte Acrylic Silk Glaze.

Original gelli plate print cut to ATC size. 

Each page altered with stencilling and . . . . . 
. . . . . a thin coat of Transparent Yellow Iron Oxide.
Original gelli plate print. . . . . . . 

. . . . . . after a thin coat of Transparent Yellow Iron Oxide.
This gelli plate print was a rescue print. The original print was too dark with mostly burnt umber and a little transparent yellow iron oxide. To lighten it up, titanium buff fluid acrylic is stencilled through a flower design stencil.


A master board created with a brayered background, various stencilled designs and some stamping using DecoArt chalky paint. This board is used to cut two ATC size pieces from for the journal.

Here's how I made the master board:

Two colours of fluid acrylic are roughly brayered onto 300gsm card.

A variety of stencils, fluid acrylic colours and a white Sharpie pen are used to create random designs on the surface.

DecoArt chalky paint in Everlasting is used to stamp images onto the board - Andy Skinner stamps.

Detail shot
Detail shot

Detail shot

The pages have a thin coat of transparent yellow iron oxide.

The front and back covers of the journal are both made from the same gelli print as shown above.

The image of the girl is stamped onto tissue paper and applied to the gelli print. 

Crackle glaze is applied, left to dry and antiqued with some burnt umber DecoArt fluid acrylic paint. I love how the print still peeks through.

The edges of the cover are stencilled with DecoArt carbon black fluid acrylic. 

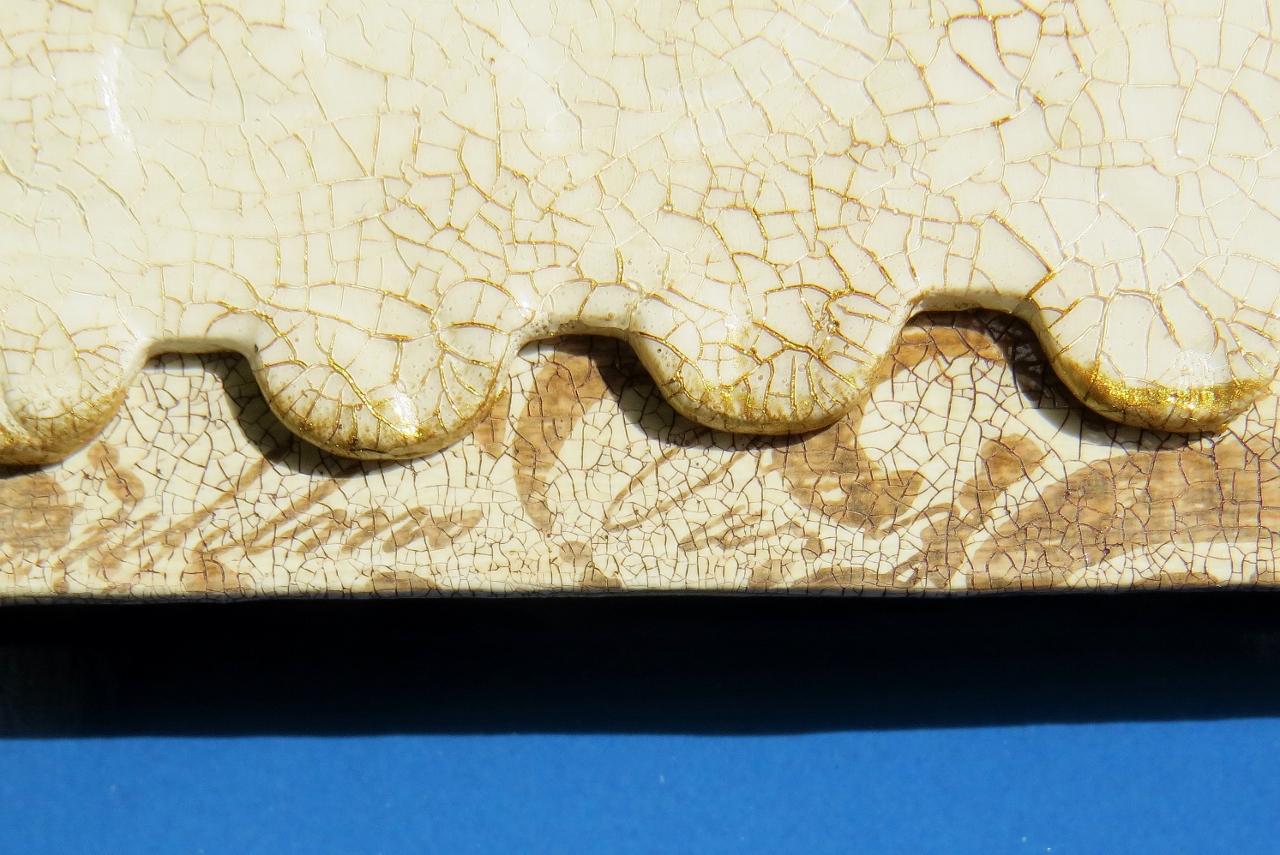
The image on the back cover is applied using the same method as the front cover. It was then tinted with DecoArt quinacridone gold fluid acrylic to completely change the look. You can still see a little of the blue peeking through and in the top left corner you can see the stamped image that is blue on pink tint on the original. The cover had crackle glaze applied using the same method as the front cover.


The edges of the back cover are stencilled with black modelling paste. When dry this is dry brushed with DecoArt metallic gold fluid acrylic - this image doesn't show how the gold twinkles unfortunately. The rings holding the pages together are made by shaping some rusty wire around a paint brush.

I hope you like our new challenge and feel inspired to join in! We are a small bunch of ladies who love to use stamps and stencils for fun and we want you to have fun too. Please pop over to Stamps and Stencils to see what my amazing Teamies have made too. It would be wonderful if you visited their blogs too to see more details of how they made their pieces.

It's up to you now!

Monday 1 June 2015

What Makes You Smile?

Good morning all. Today sees a new challenge begin at Our Creative Corner. Our host this month is the very talented Jan. Here's what Jan has to say:

'Close your eyes for a few minutes, relax and think about something that makes you smile..............
It could be a special person, a favourite place, a quote, an incident, the list is endless!

Your June challenge is to create something that will make us smile, it could be a scrapbook or journal page, a canvas, a tag, whatever your imagination dictates.

I am intrigued to see what you might make and look forward to viewing your creations.' 

What a wonderful challenge from Jan don't you agree? I love to look at pictures of my daughter when she was small and we lived five minutes walk from the beautiful Pembrokeshire coastline. I can close my eyes and imagine those wonderful warm summer days or the wild and windy days of winter when it was a joy to walk along the water's edge.

I have chosen to use a picture of my 23 year old daughter when she was about three years of age. She's sat on the warm rocks, looking out to see and who knows what stories are running through that little head?!

Here's what I made:


Antiqued box frame with the picture of my beautiful daughter.

The main pieces are die cut and coated with gesso. Some flower centres are made with DecoArt Liquid Glass to add texture.


The frame is painted then stamped with archival ink. Some translucent white is brushed randomly over the frame to tone down areas of the stamping.


The main embellishment die cuts are painted then stamped with Archival ink. Once dry, crackle glaze is applied and left to dry. Burnt umber fluid acrylic is used to antique the crackle.

The outside frame is folder embossed then painted with fluid acrylic in Titanium Buff. Some embossed areas are picked out using gold metallic acrylic. Crackle glaze is added and when dry it is antiqued with gold metallic acrylic. The edges of the postage stamp shape are given a swipe with gold acrylic too.

The inside frame is painted the same colour as the outer frame. It is then stamped with archival ink, crackle glazed and antiqued as before.

Close up to show the stamped and crackle glazed sand dollar die cut. The little 'spines' are a part of a dandelion die cut. Sand dollars don't have spines but I liked the effect so added them!

The die cut seahorse is treated in the same way as the sand dollar. The added spines give the seahorse a mystical look don't they? Some edges of the sand dollar and the seahorse have been swiped with gold metallic paint.

To create the box frame effect, a frame was cut from foam board and covered with tissue tape. Once everything was assembled, all the edges (two frames, foam board frame and backing card) are all sponged with metallic gold acrylic.

At this stage I thought the frame was finished but the more I looked, I felt something was missing. Not one for using many quotes/words on my pieces, I decided to add some little homemade shells to keep with the seaside theme.

The shells are made in silicon cake decorating molds using Fimo clay. This somewhat grainy image shows what they look like before and after. I really should play with this stuff more often!

First shell in place.

Detail shot to show second shell in position.

Detail shot.

Shot to show box frame effect.

Detail shot.

I close my eyes and dream of twenty years ago on a warm summer day by the sea. . . . .

That's my dream when I close my eyes. What's yours I wonder? Join in with our new challenge at let us share your dream. For more wonderful inspiration pop over to Our Creative Corner and see what my teamies have made - you won't be disappointed!

Our challenge is being sponsored this month by the wonderful Tando Creative:


It's up to you now. Don't forget we will be inspiring you with posts about our makes with Tando Creative products. You can also look forward to seeing who won our previous challenge, a secret guest designer and the Top Talent spot from April's challenge. Lots more fun to come so do pop back!