Friday 11 March 2016

Andy Skinner, DecoArt and Stampendous! Blog Hop

Morning everyone. It's my pleasure today to be featured over on the DecoArt Mixed Media blog as part of the Stampendous! blog hop. We are featuring the new stamps designed by Andy Skinner for Stampendous! along with DecoArt Media Line products.

Here's a sneak peek of my project which will go live today:

I wanted to do something a little unexpected with the stamps so you'll have to see what that was by visiting my link below!


For the DecoArt Mixed Media Blog click on the links here:
   Monday Andy Skinner
Tuesday Mark Gould
       Wednesday Mel Hookham
       Thursday Jools Robertson
                      Friday Julia Stratford-Wright (Me!)

For the  Stampendous! Blog click on the links here:
   Wednesday

You'll find all the info about joining in the blog hop over on the links above - you need to comment to be in with a chance of winning one of three prizes which will all be available for international shipping! Today is the last day to join in so don't forget to get hopping! Good luck and thanks for your visit.

Friday 4 March 2016

DI Travel Bag At A Vintage Journey

Hi everyone. Today I have some really exciting news!! I've been asked to join the hugely talented team at A Vintage Journey and today is the first project I have made for them as a Creative Guide! I feel really honoured to have been asked and I do hope you'll like what I've come up with for the lovely Nikki's challenge. Here's what she has to say:

'For our birthday challenge we thought it would be fun to challenge you to use the products in our DI Travel Bag this month. You’ve seen how the Creative Guides have used the products in the past and you will see how they use them this month too. So join us in using the following products and enjoy the journey!

Substrate: Board (eg grey board, coaster board, cardboard)
Main Colour: Lilac or Pale Purple
Technique: Rust Effects (perhaps using rusting or embossing powders or rust coloured paints)
Product: Something Metal'

Here's the piece of wall art I've made for the challenge:


I've used grey board for both substrate layers; metal for the heart, wire, oval embellie and the decorative band and finally, I rusted the band and the oval using acrylic paints. The heart and wire were both pre-rusted.


One piece of grey board is sealed with gesso and stencilled with a home-made stencil and some modelling paste. A piece of lace is applied along with a second stencil design and modelling paste which is kept very sketchy and rough. White, turquoise and magenta misters are then used to add colour. To add a more purple hue, acrylic paint is then added but it still looks blue I'm afraid - no matter how many photos I took!! A little interference paint was also added to highlight some areas.

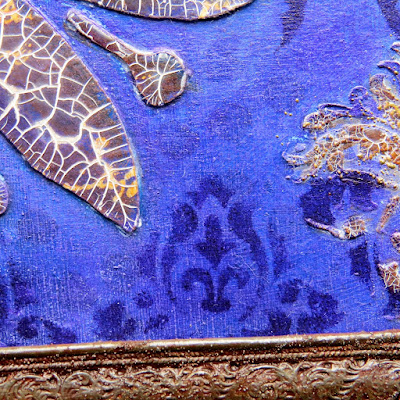
Detail shot.

The large stencilled areas are stamped with script and white gesso. Quinacridone gold paint is applied and dried. Thick crackle glaze follows and after drying, white antiquing cream is used.

Vague stencilling is applied with purple acrylic paint and the roughly stencilled modelling paste is given the same treatment as the main areas.

The decorative metal band is part of an old bracelet I bought in a charity shop. This has been given a rust like finish using texture sand modelling paste, grey and quinacridone gold paint.

The heart and wire are pre-rusted but the oval embellishment received the same rusting process as the metal band seen previously. The wire has been curled around a paintbrush handle.

This is the metal embellishments prior to rusting. I've added the pre-rusted heart so you can compare.

For the base layer, card is folder embossed and sealed with gesso. A light lilac colour is mixed and applied. This is followed by lots of dry brushing with titanium white fluid acrylic, a layer of crackle glaze and more quinacridone gold to highlight those cracks!

The embossed card is then applied to more grey board and all naked edges are finished with a Krylon pen.

All paints and mediums used are by DecoArt and they just happen to sponsoring this birthday challenge so you really must link up a project to be in with a chance of winning a wonderful prize! Remember that the Creative Guides will also be selecting their top three projects to win a pinworthy badge. Please do pop over to A Vintage Journey to see the wonderful inspiration from my lovely teamies!

Tuesday 1 March 2016

The Return Of The Challenge

Hi everyone. It's time for a new challenge at Our Creative Corner and here's the challenge:

We are taking a trip down memory lane for this challenge! We would like you to re-visit a project that has been featured at Our Creative Corner. You need to choose your challenge from the following list and make sure you mention which challenge you have chosen in your post:

"The Return of the Challenge!" (click on the links for info)

June '13 "Recipe"

July '13 - "Captured Memories"

August '13 - "Words, Words, Words"

September '13 - "Forgotten Things"

November '13 - "Tic Tac Toe"

January '14 - "No More Shopping Sins!"

February '14 - "Three Colour Challenge (without the use of black)"

April '14 - "With a Song in Your Heart"

May '14 - "Love Those Leftovers!"

June '14 - "Flaming June"

July '14 - "Homemade Flowers and Hand-dyed Ribbon"

August '14 - "Summertime"

September '14 - "Autumnal Image Inspiration"

October '14 - "Go Rustic!"

November '14 - "It's Magic!"

February '15 - "Tic Tac Toe - Fun!"

March '15 - "Junk in Your Trunk"

April '15 - "Colour Your World"

May '15 - "April Showers Bring May Flowers"

June '15 - "What Makes You Smile"

July '15 - "Mexico Moods"

September '15 - Shades of Autumn"

November '15 - "Topsy Turvy!"


So there you have it! Have fun and link up your project with us this month.

For my project I chose 'Flaming June' from June 2014. I chose this not just because it was originally my challenge but because I love bright colours and the challenge asks you to use orange as your main colour. Here's the piece of wall art I made:

A piece of wall art featuring the following from the inspiration image: the colour orange and a female. Although the painting is beautifully traditional, I decided to go very modern with some retro overtones. Here's the inspiration image:

Perhaps a little artistic license on my part but it goes to show that a challenge can be interpreted in many different ways! I love this painting but it was the colour I really used for inspiration from it.

Firstly a gelli print is made using orange and yellow paint brayered together. The print is lifted on white copy paper. For the next step a stencil and some black acrylic paint is used to add the female image to the gelli print.

After this, many layers of gloss medium are applied until the original paper feels very pliable. Once completely dry, the backing paper is removed with water and a gentle rubbing motion as shown here:

Once the paper is removed, the areas without paint become transparent (perhaps a little milky).

The back of the acrylic skin once all paper has been removed.

A background is made on a piece of greyboard which is primed with gesso. The first step is to spritz the acrylic paint sprays (not white) until the desired effect is achieved. Some water can be sprayed onto the paint to help it combine. Once dry the white spray is used liberally and randomly over the orange toned layer. Stencilled images are then applied using black StazOn .

The background stencilling can be seen through the acrylic skin to add extra depth to the piece.

Detail shot.

To hold the skin in place, some upholstery tacks are coloured with black StazOn, the points are shortened with tin snips and the tacks are then stuck on.

The background images all revolve around circles and tear-drop shapes.


The edges of the grey board are swiped with the StazOn ink pad to frame the piece.

I hope you like where my journey took me from the inspiration image to my final piece.!

We have a generous sponsor this month so if you are lucky you could win the prize provided by these people:

We will also be featuring our Top Three Talent followed by one amazing artist who will become our Top Talent and join us with their own art work the following month. Don't forget to pop over to Our Creative Corner to see the wonderful inspiration from the rest of the team.

Thanks for staying with me and I look forward to seeing your entries when they're linked up!