Sunday, 1 June 2014

Flaming June At Our Creative Corner. . . . . . .

Hi everyone. It's my turn to host the challenge at Our Creative Corner this month. I'm excited to bring this challenge to you because I chose a beautiful painting as the inspiration for your work:


Flaming June by Lord Frederic Leighton 1895
Now for some, this is an overtly romantic image which perhaps fails to ignite their creativity. However, love it or not, I don't think anyone can fail to be moved by the quality of the painting and that glorious range of orange tones. So, for your challenge this month, you are asked to make a project which features orange as the main colour on your work. You may also take inspiration from anything else in the painting that appeals to you.

We have a new sponsor this month, the wonderful Tando company who produce so many amazing chipboard items just begging to be altered. They also have a range of other items including a range of quality stencils which can be used for endless styles of work. Never used Tando products before? Click on the image below and have a good look around their website - I dare you not to spend money once there!


Tando Creative


Here's what I made this month using die cutting and stamping as my main techniques. Oh, of course, it wouldn't be me without a little crackling so that's there too! I should warn you that there are lots of photos so get a drink and put your feet up before you start!

A gift bag with matching gift label and a small matchbox style gift box. 

Gift bag and matching label.

Matchbox style gift box with floral embellishment.

View inside the gift bag showing stamped and inked reverse and matchbox in situ.
Various die cut florals. Inked with distress, stamped with distress, edged with versamark followed by gold EP then shaped before assembly. The flower centre is made from fimo clay. Shaped and stamped to create depth then antiqued with DecoArt acrylic paints.

A die cut flourish is coloured with distress ink and finished with gold EP as before.

More fimo clay was cut into heart shapes, stamped with a clean stamp then when dry, antiqued with DecoArt acrylic paints. The crinkle ribbon was coloured with distress stains and dried. When applied to the bag, the two hearts hold the ribbon in place - on both front and back of the bag.
Close up view to show detail on fimo heart.
A hitch fastener was covered with DecoArt One Step crackle. When dry some acrylic paint was applied to highlight the cracks. Sadly, I can see little fibres from a baby wipe very visible in this image!!

The inside of the box is lined with card which has been stamped with distress ink, embossed with clear EP then inked with a lighter distress ink shade. Some areas of the stamped image had the colour removed/lightened with a waterbrush.
A die cut gift label was stamped and coloured using the same techniques as before. Some tiny punched flowers were made from the scrap pieces of inked card. Each flower was shaped and a small jewel was added to the centre. The edges were roughly embossed with gold powder and some gold embroidery thread attached to tie the tag onto the gift.
Close up to show the ink removal on certain areas of the stamping.
Time to reveal the contents of the little box! I decided to make some small treasures on a favourite theme.


A purchased rusty bell which had some rusty wire attached. Two pieces of miniature art and clay heart pendant.

The small piece of art on the left was made by stamping the image onto frosted shrink plastic and a hole punched for the wire. The piece was then shrunk using a heat gun. Rusty wire was twisted through the hole and finally a Krylon pen was used around the edges.
The heart was made by rolling out fimo clay and cutting a heart shape. A stamp was then applied to the clay to provide a relief pattern. The heart was baked then painted and antiqued using DecoArt acrylic paints and crackle medium. The rusty wire hanger was attached to the back of the heart and covered.

The final treasure is a little tile made with clear shrink plastic. The image was stamped onto the plastic as before. The plastic was shrunk with a heat gun. Alcohol ink was applied to the reverse of the plastic followed by a piece of metal tape. Finally some utee was melted on the face of the tile to give a more luxurious finish.


I do hope you enjoyed looking at this make. Not so much paint and crackle this time but still fun to make! I do hope you go over to Our Creative Corner and see what the other members of the DT have come up with - you're certainly in for a treat! 

It's your turn then to come up with a mainly orange creation and link up at Our Creative Corner. There's a wonderful prize available from Tando if your name comes up in the randomly generated draw or you could be the challenge winner and feature on our blog next month - now there's a chance to showcase your amazing work! You may even be one of our top three talents - you have to enter to have a chance at any of these though.

Thanks so much for visiting. Enjoy your Sunday.


Wednesday, 7 May 2014

Heavy Metal At SanDee & Amelie's Steampunk Challenges. . . . . . And Simon Says Stamp Monday Challenge.

Still trying to get back properly into blogging! I think I need to start at the beginning again and enter challenges just for fun and to see the work of lots of other crafters. I found this worked for me before and I'm hoping it will do so again.

So. . . .I had no trouble finding a challenge of challenges which appealed to me and the first one is  'Heavy Metal' at SanDee & Amelie's Steampunk Challenge blog. I always wonder how to describe Steampunk and I just hope that my project does fit that title!

The second challenge I'd like to enter this project for is  Simon Says Stamp Monday Challenge which this week asks you to be inspired by the word 'Five'. I've chosen to use five different elements to produce my tag:

Stamping; Die Cutting; Acrylic Paint Techniques; Modelling Paste through a stencil and using Distress Markers to colour an image.
I do like this kind of challenge which can be open to interpretation in a variety of ways - great fun!

Here's what I've made with some details to give you an idea of construction:

I loved the challenge title and if you have visited here before, you will know that I love creating faux rust finishes on anything that stands still long enough! I hope that the tag base looks fairly authentic.

The first stage of the rusting process was to seal the surface with two coats of gesso.  Next came DecoArt Modelling paste through a stencil which was left to air dry. Once dry, several coats of various DecoArt Traditions paints were applied in order to create the 'rusty' look. I can't be more precise because the technique was developed by Andy Skinner (my paint guru!!) but you can attend a class or do an online workshop and learn these amazing paint effects. Just click on Andy's name above and you'll find information about what's on offer.
The large washer in this image is a 'found' object and needed no transformation! The Idea-ology pointer was scuffed, crackled and a little acrylic paint rubbed into the cracks to highlight them.
The balloons have rusty wire attached. Two of the balloons remain tethered to the hand in the corner which is part of the original stamped image. An idea-ology hitch fastener is being held in the hand and the wires are tethered to it. The hitch fastener has been given the same aged look as previously described. I just had an idea for the quote and two tethered balloons signify limited freedom whilst one balloon is flying free. . . . . . . it worked for me anyway!
The quote label is handwritten then crackled and aged with acrylic paint as before - I wanted to achieve the look of old porcelain or aged enamelled metal


Die cut cogs (meant to be wheels) were given the rust treatment and held together by faux screw brads which were treated in the same manner as the pointer in the previous image.

Close up to show the edge of the tag which hopefully looks like rusting metal!

The balloons were part of a larger La Blanche stamp. They were stamped with archival ink onto card and cut out. Colours were applied using Distress markers and a waterbrush. A 'crackle' type image was stamped randomly over the balloons using archival ink. The little compass 'wheels' were leftovers from a previous project. They were stamped onto vintage book pages backed with card and cut out. The needle was coloured using the distress markers and waterbrush again.

I had so much fun making this tag. No hardship when you choose the theme and work on something which is right up your street!

Thanks for looking and thank you to those few people who have stayed with me despite the lack of activity here. I really do appreciate it.

Sunday, 4 May 2014

Sponsor Spotlight At Our Creative Corner. . . . .

Good morning all. Thought I'd give you a couple of little sneak peeks of my post at Our Creative Corner today, using some amazing stamps from Crafty Individuals. If you haven't seen our new challenge yet then click here to go to the blog and see all the inspiration from the DT and details of a fab prize from Crafty Individuals who are our sponsor this month.


Thursday, 1 May 2014

Love Those Left Overs At Our Creative Corner. . . . .

Hello everyone. It's time for a new challenge at Our Creative Corner and the wonderful talent that is Linda aka the 'Funkie Junkie' has set the challenge. Linda is asking us to use up our left overs to make a new project.

We have launched this theme previously but due to a short blog closure, we were unable to complete the challenge. Well, this time we're all set and each of us has made a new piece which we hope will inspire you to raid your scrap box! You may use any items from your box but do let us know which pieces they are on your project. As usual, all the DT will be showing their work today so do go over to Our Creative Corner - (I'm working with a group of hugely talented ladies as you will probably know if you read a blog written by a certain Tim.)

Like everyone else, I keep all kinds of left overs. I make more items than I need for a project and keep them for another time. I even keep paint/ink covered card and paper just because I love the colours and can't throw it away. We're all the same aren't we?!

Unfortunately, I was so eager to use my scraps that I'd cut into one of them before I'd taken a photo but I can show you the scrap left from the left overs. . . . . confusing I know!

I was inspired by Easter when making this project so I hope you don't mind my celebration of the event being a little late.

Here's what I've made:


An Easter basket with a rusty wire hanger. I fitted a medium sized egg in it but it could be used to collect small eggs on an egg hunt.
The 'basket' was made from the top section of a an empty chocolate box.
My scraps included two flowers leftover from a previous project (one shown above), a piece of paper used to clean my brayer during a gelli plate session and in the next image . . . . . . . 
. . . . . . some die cuts made for a previous project but rejected. This image shows the original finish on the die cuts which I put inside the basket out of sight. The other side of the die cuts were given an alternative finish which is shown later in this post.
The original flowers had a silver brad in the centre but for this project I painted and crackled them. The larger flower is on the side of the basket.
This wonderful butterfly image was stamped onto the brayered paper, stuck onto card and then cut out. Crackle followed to comply with the grungy look. Some rusty wire is used for the antennae as I broke the card ones off!
The chocolate box was painted with gesso, two coats of acrylic were added followed by some modelling paste through a stencil (all paint and mediums by DecoArt). Lastly, the piece was finished with acrylic paint and a sponge followed by the usual crackle. More acrylic paint was used to antique the surface.
Using the same stamp but choosing a different coloured area of the brayer paper makes the image look slightly different. I also cut it out slightly differently just to avoid repetition.
This image shows the 'rivets' on the top edge of the basket.
To ensure the die cuts toned in with the stamped butterflies, similar colours were applied to one side of each die cut using a brayer. Crackle and a little extra acrylic paint followed. I love how these turned out and  really didn't see the need to change the original design on the other side as it wasn't really visible.
Holes were made in the box in two places and rusty wire threaded through to act as a hanger. The ends were twisted up the hanger to complete the look.
You can just see the edge of the larger flower on the left of this image! I forgot to take photos of the scraps before starting so I do apologise.

Your turn to go through your scraps and see what you can make! There is a full copy of the challenge over at Our Creative Corner along with one or two rules we ask you to follow. Will you be our winner and in the Spotlight? Don't forget to see the Sponsor Spotlights over the coming month from some members of the design team. There's also some exciting news about other things happening this month - don't miss it!

Thanks so much for visiting today and do leave a comment if you'd like to let me know what you think.


Sunday, 6 April 2014

Oops! I Got This Wrong. . . . .

Sorry everyone. I've been very silly and I've done the wrong challenge this month for Anything But A Card! Don't ask me why this happened - an extremely senior moment I fear! Thanks to those who took the trouble to read and comment.

Here is April's challenge at Anything But A Card: Spring Forward! Just click on the words and you'll be transferred to the blog where you can view the first DT group showing their wonderful 'Spring Forward' makes.


Good morning to all. Today sees the start of a new challenge at Anything But A Card. This month, we're asking you to use a colour inspiration image:

A beautiful palette for you to be inspired by.

I'm not usually a fan of colour inspiration challenge themes but there was something about this combination which appealed to me. I mainly used the darker tones at the right hand end with a small amount of the more neutral colours at the other end.

You must visit Anything But A Card and see the inspiration provided by team 1 of the DT. The other talented ladies come later in the month. We are also adding some extra interest this month so keep popping back!

I've made an ATC for this challenge - hope you like it:

A Darkroom Door stamp bought long ago and not inked, inks, paint, crackle medium, die cutting and some punched florals make up this ATC.

A die cut shape used for the top of the ATC. This was painted - using DecoArt Americana paints - with a mixture of the colours from the image then crackled. The punched florals were also painted and crackled then shaped and assembled. A small black gem was used for the centre of each flower - the only bling I seem to use with any regularity!


The ATC was coloured and stamped with one shade of Distress Ink. Some hidden areas were stamped again with Versamark and shimmer powder was dusted over - you can just see this at the top of the image. The face was stamped with Archival Ink and the edges of the ATC were inked with a darker shade of Distress Ink.
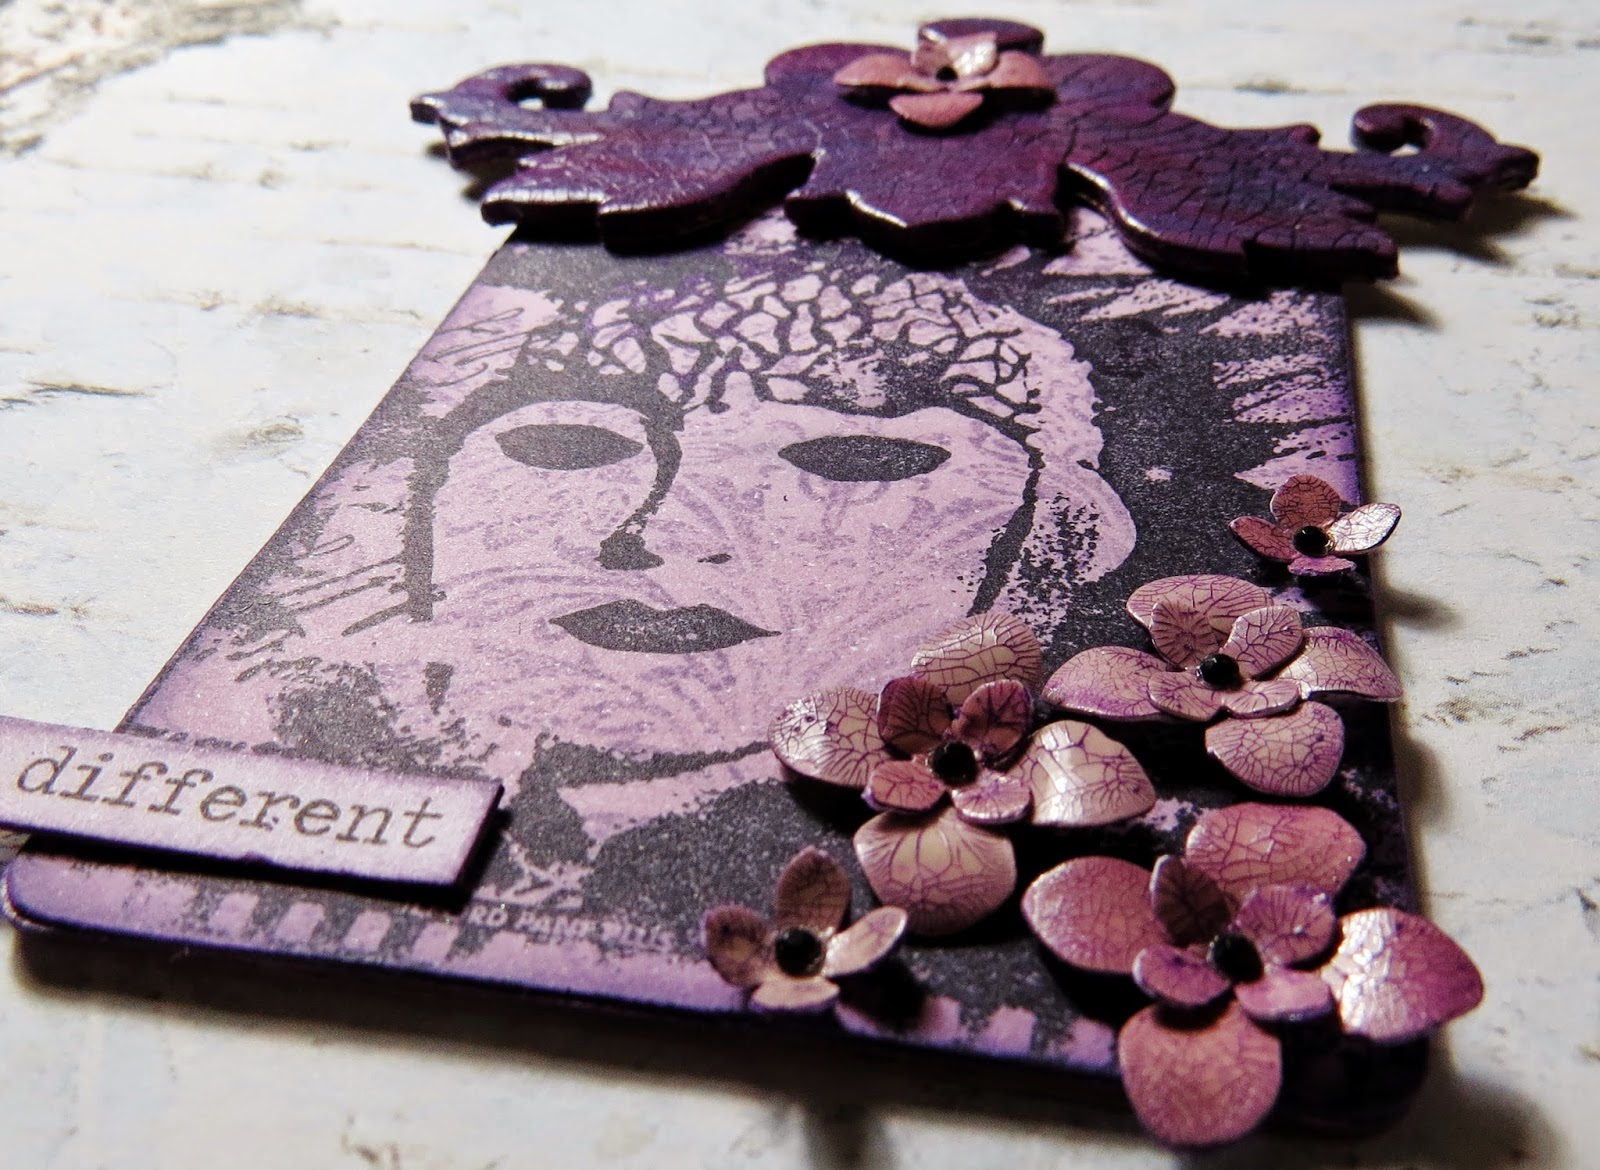


The florals were punched with my favourite punch - I do a lot of these but I really love their delicate look and almost porcelain like appearance.


A Chit Chat sticker was inked and applied. I chose this word because that's how I think of the image. She's very mysterious and you could come up with all kinds of stories about her!


Thanks so much for dropping by. The last 6 months or so haven't been my most sociable in blogland but I'm getting there! Thank you so much to those of you who have continued to support me with visits and words of encouragement - it is so much appreciated.

So, what are you going to do with our wonderful colour palette inspiration this month at Anything But A Card? I look forward to seeing what you create. Just remember: we are a 'cardless' challenge but you can make anything else you like!


Tuesday, 1 April 2014

With A Song In Your Heart. . . . . . At Our Creative Corner


Hello everyone, hope your week has started well. It's time for a new challenge at Our Creative Corner and this month your host is the hugely talented Alison of Words and Pictures.

The theme for the April challenge is 'With A Song In Your Heart'. Alison asks that you create something inspired by and including a song title or lyrics. You are asked to include the words on your creation and to make sure that the song title appears in your post.

In an ideal world, it would be fabulous if you included a link to the music so that we can have a listen!  But that's not compulsory.

The song I have chosen is 'For Your Babies' by Simply Red. Click here if you'd like to have a listen to this wonderfully sentimental song.

I have chosen to use a picture of my daughter when she was about two. I converted it into a threshold image and then used some fabrics, DecoArt products and chipboard tag shape as a substrate.

This is the 'threshold' copy of the photo I developed using some free software called 'Photoscape'. I opted to leave out some details and smooth some edges and created this:

A Tando chipboard tag, DecoArt SoSoft fabric paint, section from a piece of silk screen printed challenge and some polyester wadding were used to construct the hanging. (Mustn't forget the rusty wire too!).
I used a small section from a piece of screen printed fabric which I made at a recent workshop. The little picture is padded and can be hung using a rusty wire loop which I attached.


Probably the line from the song which I love the best and the one which conjures up my daughters gorgeous face when she was a little girl. I printed the words out and made them into a banner with some ink to dirty up the edges. The blue script was made using a stencil and some DecoArt SoSoft Fabric Paint on a piece of foam. A rusty wire loop for hanging is sandwiched between the layers.

I chose a section of the screen printed fabric which featured two different colours and a very distinct design element. These images are really best viewed not quite so close up but I wanted to show the detail to you. 


The script was stencilled on top the black fabric paint but I love how it seems to be coming through from underneath.
Using the fabric paint lightly gives an almost sketchy appearance to the work which I like very much. 
 I hope you like this little project. You need to pop over to Our Creative Corner and see the inspirational work produced by my fellow teamies. After that choose your song and get creating for us! Can't wait to see which song you choose and how you interpret it.

Thanks so much for looking.

Sunday, 23 March 2014

In The Spotlight At Anything But A Card. . . . . Plus My Mini Challenge To You


Hello everyone from a beautiful sunny morning in Yorkshire - I'm visiting friends this weekend.

Today at Anything But A Card it's my turn to be in the spotlight and tell you a little more about myself. I've made two projects for you to see including one which is my mini challenge to you. I do hope you'll find time to join in!

Here's two sneak peeks for you and I love it if you popped over to  Anything But A Card for more details.


Crackled toes - one of my favourite things!
Stencils, die cuts, shimmer spray, paint and modelling paste - yes please!


Thanks for visiting today. Please do jump over to Anything But A Card and have a quick look. Enjoy the rest of your weekend and I hope it's sunny where you are too.