Sunday, 6 April 2014

Oops! I Got This Wrong. . . . .

Sorry everyone. I've been very silly and I've done the wrong challenge this month for Anything But A Card! Don't ask me why this happened - an extremely senior moment I fear! Thanks to those who took the trouble to read and comment.

Here is April's challenge at Anything But A Card: Spring Forward! Just click on the words and you'll be transferred to the blog where you can view the first DT group showing their wonderful 'Spring Forward' makes.


Good morning to all. Today sees the start of a new challenge at Anything But A Card. This month, we're asking you to use a colour inspiration image:

A beautiful palette for you to be inspired by.

I'm not usually a fan of colour inspiration challenge themes but there was something about this combination which appealed to me. I mainly used the darker tones at the right hand end with a small amount of the more neutral colours at the other end.

You must visit Anything But A Card and see the inspiration provided by team 1 of the DT. The other talented ladies come later in the month. We are also adding some extra interest this month so keep popping back!

I've made an ATC for this challenge - hope you like it:
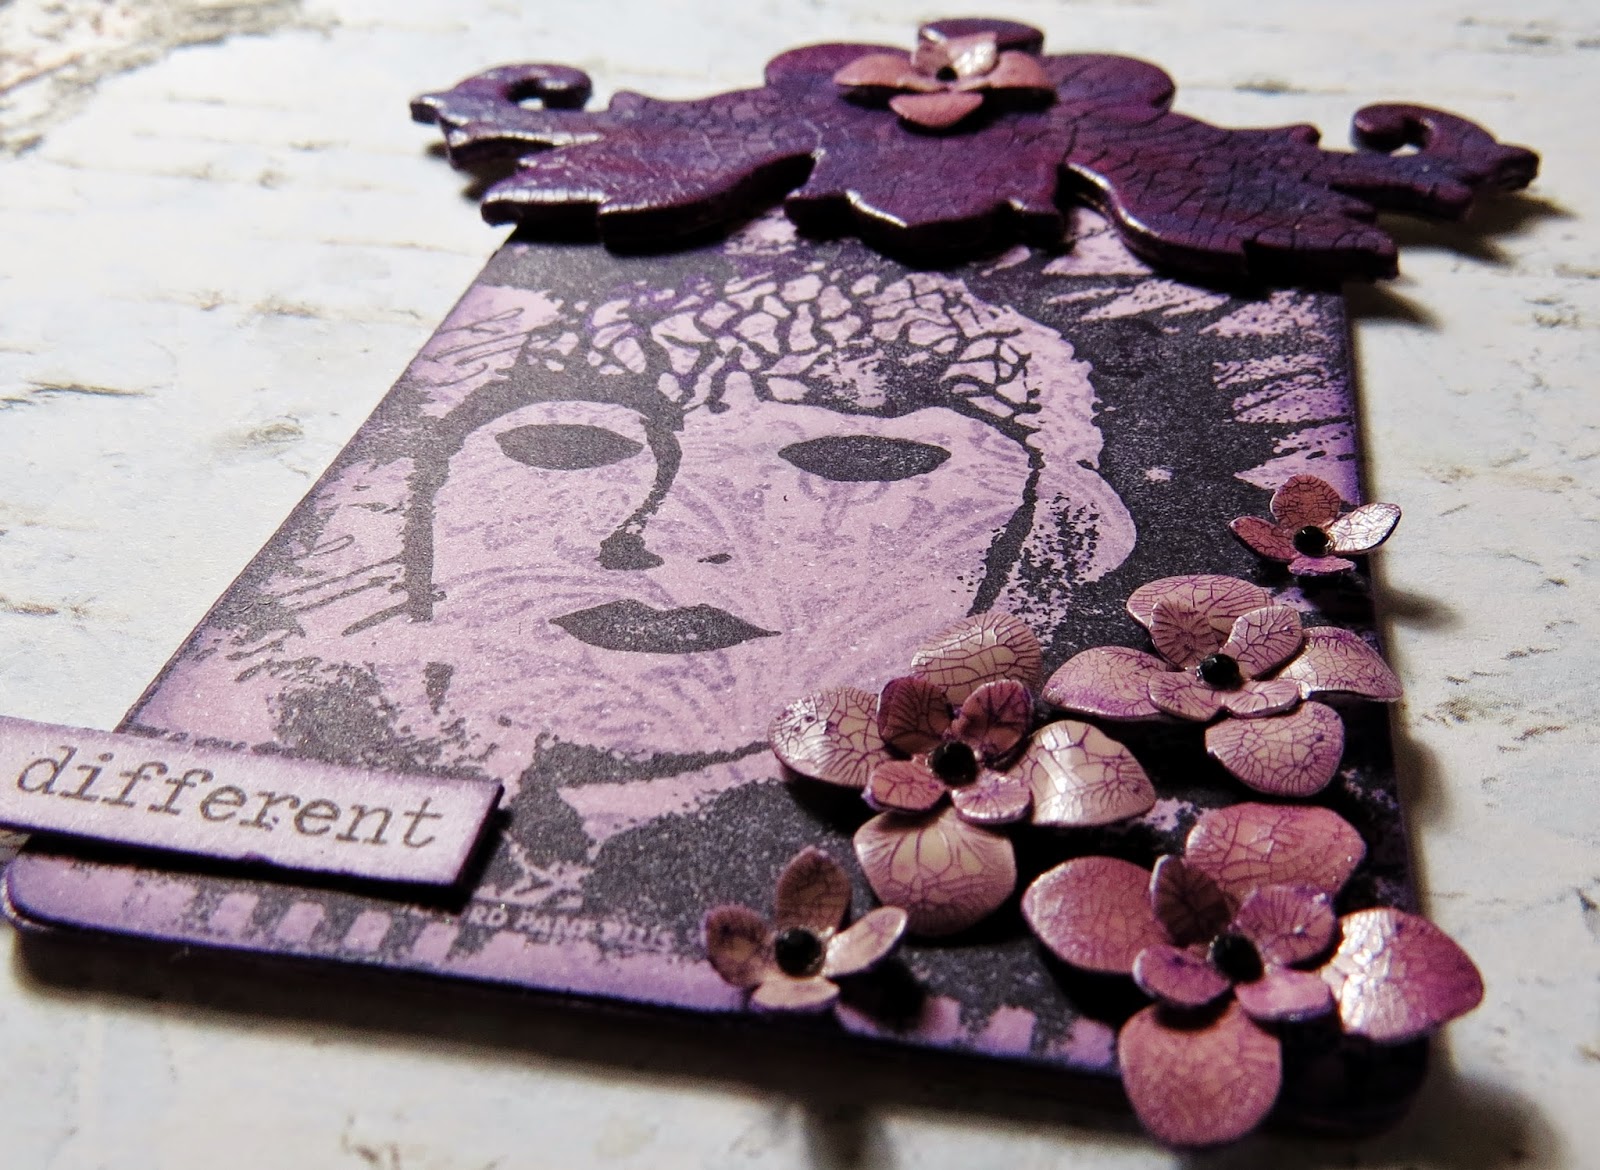
A Darkroom Door stamp bought long ago and not inked, inks, paint, crackle medium, die cutting and some punched florals make up this ATC.

A die cut shape used for the top of the ATC. This was painted - using DecoArt Americana paints - with a mixture of the colours from the image then crackled. The punched florals were also painted and crackled then shaped and assembled. A small black gem was used for the centre of each flower - the only bling I seem to use with any regularity!


The ATC was coloured and stamped with one shade of Distress Ink. Some hidden areas were stamped again with Versamark and shimmer powder was dusted over - you can just see this at the top of the image. The face was stamped with Archival Ink and the edges of the ATC were inked with a darker shade of Distress Ink.


The florals were punched with my favourite punch - I do a lot of these but I really love their delicate look and almost porcelain like appearance.


A Chit Chat sticker was inked and applied. I chose this word because that's how I think of the image. She's very mysterious and you could come up with all kinds of stories about her!


Thanks so much for dropping by. The last 6 months or so haven't been my most sociable in blogland but I'm getting there! Thank you so much to those of you who have continued to support me with visits and words of encouragement - it is so much appreciated.

So, what are you going to do with our wonderful colour palette inspiration this month at Anything But A Card? I look forward to seeing what you create. Just remember: we are a 'cardless' challenge but you can make anything else you like!


Tuesday, 1 April 2014

With A Song In Your Heart. . . . . . At Our Creative Corner


Hello everyone, hope your week has started well. It's time for a new challenge at Our Creative Corner and this month your host is the hugely talented Alison of Words and Pictures.

The theme for the April challenge is 'With A Song In Your Heart'. Alison asks that you create something inspired by and including a song title or lyrics. You are asked to include the words on your creation and to make sure that the song title appears in your post.

In an ideal world, it would be fabulous if you included a link to the music so that we can have a listen!  But that's not compulsory.

The song I have chosen is 'For Your Babies' by Simply Red. Click here if you'd like to have a listen to this wonderfully sentimental song.

I have chosen to use a picture of my daughter when she was about two. I converted it into a threshold image and then used some fabrics, DecoArt products and chipboard tag shape as a substrate.

This is the 'threshold' copy of the photo I developed using some free software called 'Photoscape'. I opted to leave out some details and smooth some edges and created this:

A Tando chipboard tag, DecoArt SoSoft fabric paint, section from a piece of silk screen printed challenge and some polyester wadding were used to construct the hanging. (Mustn't forget the rusty wire too!).
I used a small section from a piece of screen printed fabric which I made at a recent workshop. The little picture is padded and can be hung using a rusty wire loop which I attached.


Probably the line from the song which I love the best and the one which conjures up my daughters gorgeous face when she was a little girl. I printed the words out and made them into a banner with some ink to dirty up the edges. The blue script was made using a stencil and some DecoArt SoSoft Fabric Paint on a piece of foam. A rusty wire loop for hanging is sandwiched between the layers.

I chose a section of the screen printed fabric which featured two different colours and a very distinct design element. These images are really best viewed not quite so close up but I wanted to show the detail to you. 


The script was stencilled on top the black fabric paint but I love how it seems to be coming through from underneath.
Using the fabric paint lightly gives an almost sketchy appearance to the work which I like very much. 
 I hope you like this little project. You need to pop over to Our Creative Corner and see the inspirational work produced by my fellow teamies. After that choose your song and get creating for us! Can't wait to see which song you choose and how you interpret it.

Thanks so much for looking.

Sunday, 23 March 2014

In The Spotlight At Anything But A Card. . . . . Plus My Mini Challenge To You


Hello everyone from a beautiful sunny morning in Yorkshire - I'm visiting friends this weekend.

Today at Anything But A Card it's my turn to be in the spotlight and tell you a little more about myself. I've made two projects for you to see including one which is my mini challenge to you. I do hope you'll find time to join in!

Here's two sneak peeks for you and I love it if you popped over to  Anything But A Card for more details.


Crackled toes - one of my favourite things!
Stencils, die cuts, shimmer spray, paint and modelling paste - yes please!


Thanks for visiting today. Please do jump over to Anything But A Card and have a quick look. Enjoy the rest of your weekend and I hope it's sunny where you are too.


Thursday, 6 March 2014

Playing With DecoArt Metallic Lustres. . . .

 Hello everyone, I hope your week is going well. I have been playing with DecoArt Metallic Lustres again. If you missed my first post in this series, please click HERE.

Having tried the lustres mixed with water in a mister, I decided to see if they would behave as other water based products do when using a stencil and a baby wipe.

I came up with some results which I really like and they are now ready to be used as tag backgrounds for future projects:

The tag on the left has been misted with the Lustre mixture and also has some extra layers which I will explain later.  The tag on the right is just DecoArt Metallic Lustre in black shimmer.
Mix the Metallic Lustre with some water in a mister - shake vigorously to ensure the Lustre dissolves. (I had no problem with the mixture blocking the mister when I went back to it the next day.) I have misted onto either white card or gessoed card but you could paint first and add various layers before misting the lustre on your project.
Allow the misted tag to dry thoroughly. Place chosen stencil onto tag and using a baby wipe, remove the lustre as desired. If you rub too hard it will lift the surface of the paper so beware!
Close up image for detail.

Paint a tag with two or more layers of DecoArt gesso to seal the surface. Apply DecoArt modelling paste through a stencil with a palette knife. Allow to dry. Mist with lustre spray and dry. Remove areas of lustre using a stencil and baby wipe as before. Add some shading as required using coloured pencils. Spot the mistake in this image (I forgot to put the correct tub of lustre in - it should show the colour iced espresso!).

Detail image to show pencil used on top of modelling paste - it can be used wherever needed.

To start building layers, paint a thin layer of DecoArt paint onto the craft sheet. Tape the stamp lightly into the paint several times then apply as required on the tag. Wash your stamp immediately to remove paint. At this point you can continue with as many layers as you wish but just remember that the lustre mist will react with wet products even after it has dried. If you want to avoid this, I suggest you spray it with a thin layer of sealant such as DecoArt Americana spray finisher/sealer. When dry, you can then continue your layers.
Detail image to show stamped paint.

For a further layer, you could stencil paint onto your design as shown.

The same stencil was used for both the modelling paste and the paint.
A mister, a stencil and a baby wipe remember. Love how you can get an idea of the shimmer here. Great for a single layer project perhaps.
This image gives you some idea of the level of shine you can expect to achieve. 


Here are two tags which I've started work on and which need more work but they give you an idea of where you can go with this technique.
 The tag on the left uses the method shown above. The one on the right had some acrylic paint added to the metallic lustre in the mister. I used it through a stencil and really like the effect. However, I left the mixture in the mister until the next day and found it had blocked. I would suggest washing out the mister if paint is added to the mixture!


Two different stencils were used here followed by some randomly applied translucent Traditions paint.


 The image was stamped straight onto the background for this tag.


The image was stamped on another piece of card for this tag. Archival ink was used followed by DecoArt translucent Traditions paint.

Hope this gives you some further ideas for using the product. Thanks for looking and if you have time, let me know what you think.

Sunday, 2 March 2014

Sparkle At Anything But A Card. . . . . .

Hello everyone. Today sees a new challenge at Anything But A Card with the theme Sparkle. How you interpret that theme is entirely up to you. What you make is again your choice but don't forget: NO CARDS please! Remember that our DT is split into teams and you can get inspiration for this challenge throughout the month and a quick click HERE will take you to the work done by the first team.

For me, Sparkle was quite a difficult concept to work with! I like shimmer, shine and the odd touch of bling now and then but glitter and stickles don't sit very well with my style. Nothing against them at all but I'm a sparkle novice and feel totally out of my depth here!

That said, I'm not one to give up and one question kept going through my mind: 'Do you sparkle?'. I decided to base my piece on that. Not sure if I ever sparkle these days but a good dose of shimmer goes a long way to achieving the cause!

I have played with DecoArt Metallic Lustre on my tag today and I love the subtle level of sparkle/shimmer it provides. Be warned: there are quite a few pictures to scroll through here!!

My tag which really does shimmer and almost sparkle - I promise!!

A tag shape was cut from mountboard, partially folder embossed and coated with a thick layer of DecoArt gesso.
Three DeoArt Traditions colours were used to cover the tag.

I followed a technique discovered by Andy Skinner: DecoArt Metallic Lustres can be used as a shimmer spray when mixed with water in a mister. the result is as light or as heavy as you wish. I added a large amount of the lustre to my mister for extra cover.

A second colour was added to lighten the effect. Such a shame that the sparkle/shimmer doesn't show up very well in photos!!

Here the lustre is till wet and I think you can begin to see it's sparkle and shine. If it's too heavy you can wipe some off which is exactly what a did with a baby wipe.
Perhaps the angle of this photo gives you a better idea of the incredible shimmer and sparkle obtained by using this product.


I made a label for my question and roughed it up and added ink.


I have been playing with these Tando flowers for another project and couldn't resist using one on this tag. I love the combination of colours and I believe that flowers do sparkle - even on a damp day in Suffolk! They always make me smile anyway and lift a low mood with one glance.
The chipboard flower is folder embossed, covered with DecoArt gesso followed by various DecoArt paints to achieve a graduated colour effect (or ombre).

To finish the flower, I added a coat of DecoArt Triple Thick glaze to add extra sparkle. You may notice that some raw umber was swiped over the flower then wiped off with a baby wipe first to add depth.
The flower centre is one of my Fimo makes - a small flat button shape which has been given interest by pushing a rubber stamp into the clay whilst still wet. Some DecoArt carbon black Traditions followed by a rub of their Metallic lustre finished the look.


Behind the flower and embossed strips, you will see a combination of stencilled carbon black and embossed stamping. This was all added to give extra interest to this section.

Detailed view of the embossed stamping and below that the stencilling. You may also notice that some of the raised areas appear to have a dark shadow on them - I achieved this by shading with a charcoal pencil and then rubbing it in with a finger. I think the effect is subtle but just adds more depth to the piece - oh, and I never know when to stop!!
 A rusty wire hanging loop was added to the top of the tag.


Another of my Fimo makes, made using the same technique as described earlier. My little 'nod' to sparkle is not very clear here but there is a clear, tiny gem towards the bottom right of the heart!
Now it's your turn to show us what you interpret as 'Sparkle' on Anything But A Card! Can't wait to see what you come up with - hoping that one of you will help me with my 'sparkly' aversion!!