
Friday, 25 July 2014
Sponsor Spotlight At Our Creative Corner
Good morning everyone. I'm back for another spotlight post over at Our Creative Corner. This spotlight uses images from Nicecrane Designs. I can't show you the whole project so here's a sneak peek:
I do hope you go over to Our Creative Corner and see the full project. Thanks for looking! Back on Sunday with a new post.
Tuesday, 1 July 2014
Hand Dyed Ribbon and Homemade Flowers For Our Creative Corner
Good morning all. Today sees a new challenge begin at Our Creative Corner. The lovely and hugely talented Astrid is our host this month and here's what she has to say about her challenge:
'Making flowers can be a labour of love, but the satisfaction of adding some homemade flowers to your project, outweighs the effort it might take. Combining your flowers with some hand dyed ribbon, makes your project even more special. So for this challenge we would like you to create with homemade flowers and hand dyed ribbon. You can make whatever you like, be it card, tag or an altered object. All we ask is that you embellish it with your own flowers and ribbon. There are many tutorials for making flowers to be found all over the internet, so we hope you'll have fun with this challenge!'
We are very honoured to have Nicecrane Designs as the sponsor for our randomly drawn prize this month.
 |
| Wonderful Digital Stamps and versatile Collage Sheets |
Here's what I've made for Astrid's wonderful challenge. I hope you like it:
 |
| Unashamedly girly with flowers and gorgeous pink plus a little grunge of course! |
 |
| The flower was perhaps the most complex part of this project. It was die cut from card stamped with a collage stamp in grey versafine. Several layers and colours and DI followed. A stencil, some versamark ink and clear EP was used to create depth to the flower layers. DecoArt crackle glaze was then applied to each layer followed by DecoArt Antiquing Cream in Patina. The antiquing cream is rubbed off until you are happy with the result. When dry, buff it with a soft cloth for that lovely sheen. The edges of the die cut layers had versamark ink randomly added followed by Stampendous Aged Teal embossing powder. Each layer was then shaped and finally assembled to make the flower. |
 |
| The centre of the flower was created using some hand dyed ribbon (to match the colours of the flower) and a blind cord tidy which looks rather good placed upside as shown. Some of the hand dyed ribbon was pushed into the cord tidy to complete the look. The ribbon was dyed with Distress Inks and some shimmer spray. It was fully dried with a heat gun. |
.JPG) |
| The card was prepared for stamping with a light coat of DI. This was followed by a second colour which was used to stamp a butterfly image with a final sponge of the original colour. The image was stamped using jet black archival. The DI was removed from the whites of the eyes and the lips with a waterbrush. |
 |
| The stamped black image didn't quite reach to the edges of the die cut cabinet card so some tissue tape was added and coloured to match the main background shade. A Krylon pen was used to the edge the cabinet card. |
.JPG) |
| A stencil and some versamark was used with EP to add detail onto the tissue tape. |
 |
| The top of the hanging is finished with a die cut piece. This was painted with gesso followed by one coat of red magenta (from the DecoArt Media fluid acrylic range which have now been released), two coats of translucent white (same range - this paint is a MUST have!). Once dry, the layers were randomly sanded to reveal the red magenta. Next, DecoArt crackle glaze followed and finally, the antiquing cream as used on the flower. |
 |
| Rusty wire is used as a hanger and was attached on each side to die cut topper. The long ends were curled around a paintbrush handle. |
 |
| You can't see it in this photograph but the embossed areas were given a light coat of DecoArt Media Interference Paint in turquoise. when it catches the light it just gleams. |
 |
| The bottom edge of the hanging was finished with another die cut piece which was finished in the same manner as the one described above. Another piece of my hand dyed ribbon was used here to attach the die cut to the hanging. |

Hope you liked this project. It's always fun to make your own flowers and there's no limit to how many you make, what you make them out of or where you use them!
So, it's your turn now to get making those flowers and hand dyed ribbon and use them on a project which you can link up over at Our Creative Corner. Can't wait to see what you come up with!
Friday, 27 June 2014
Looking Glass For Stampendous And DecoArt
Morning everyone. Today is the final day of our amazing blog hop across the world. There has been some wonderful inspiration from hugely talented artists and I feel very proud to be amongst them. Here are the final words from Stampendous our blog hop hosts:
If you missed the beginning of our journey, be sure to go back and check it out! MONDAY - TUESDAY - WEDNESDAY - THURSDAY
This week we've shown you how to use Stampendous Rubber Stamps to transfer a terrific pattern for painting. Did you know you can sell your projects made with our images? As long as you hand stamp each one, you can sell as many as you like of any kind of project anywhere you want. You can find our detailed Angel Policy on our website.
- Stampendous will choose three blog posts from all the designer posts this week and then choose a winner from each to receive a prize package - Princeton Artist Brushes, through Willow Wolfe, is sending a Select 3750 Brush Set and a Catalyst Wedge, and we'll be adding a Stampendous Creative Palette so you can use all the new techniques you'll learn here this week. (America and Canada only)
- Bonus goodies are on offer for some lucky people who SHARE our Facebook posts and Pinterest Pins.
- For International commenters: DecoArt has agreed to mail out three fab Media Paint sample packages to international bloggers as well. YAY!
- Don't forget you also have the chance to own this amazing piece of art produced by Andy Skinner - you can only do that if you leave a comment on EACH blog post though!
 |
| Stunning isn't it? It could be yours. . . . . . |
To take part all you have to do is:
- Visit each blog and leave a comment
- Like Stampendous, DecoArt, Princeton Artist Brushes, and inspired by Willow Wolfe on Facebook!
- Repin our projects onto your Pinterest boards and tag us when you do (#Stampendous, #DecoArt, #PrincetonArtistBrushes, #byWillowWolfe) we'll be tracking!
- We've also got a Pinterest Board started!
- You have until the end of Sunday, June 29 PDT to comment on all the blog posts.
The Official Rules - Please read!
Here's my final piece using Stampendous and DecoArt products. Again, I hope you like it!
.JPG) |
| I had great difficulty photographing this piece. Trying to avoid getting myself in the picture was the first thing and trying to get the light correct was another! I took it in the garden where there was at least a reasonably attractive reflection in the mirror - my garden! |
 |
| I got a plain white mirror from Ikea and removed the mirror part whilst I worked on the frame. It was sanded, given two layers of DecoArt gesso and sanded again. Some textured grunge board was die cut and placed in position. Another coat of gesso followed to seal the grunge board. |
 |
| One of the Stampendous stencils was used to apply DecoArt Media modelling paste in several areas on the frame. This was left to air dry. |
 |
| Two colours of DecoArt Media acrylic are applied to give a base coat. |
 |
| Some washi tape was added followed by fairly random application of the colours shown. |
 |
| Some areas were brushed with a dark colour to give them depth. |
.JPG) |
| A wash was applied to the textured areas and left to dry. |
.JPG) |
| Layers of colour were then gradually built up - too many to show or mention. Once I was happy with the layers, some DecoArt Interference paint was used to highlight the same areas. this is not the finished look shown! The Stampendous Music Terms stamp was used to randomly add stamped paint to the frame. |
 |
| Another two Stampendous stamps were combined on an acrylic block and stamped in paint onto the frame. This was treated with DecoArt crackle glaze, antiquing cream and then buffed with a cloth. You can see the stamped script here and the washi tape. |
 |
| The die cut grunge board was painted with two colours of DecoArt Media Interference paint which gives a rich almost pearlised look without being overpowering. You can see here how the wash applied to the stencilled paste gives a great range and depth of tones. This section was also crackled. |
 |
| The small green circles were stamped with a paintbrush protector and the same colour acrylic as the stamping. More crackle glaze applied followed by antiquing cream. |


Well that's my last post for Stampendous and DecoArt and I like to say a very big thank you to all those who made this blog hop possible and to all the other wonderful artists who took part - particularly my DecoArt International Design team friends!
Your turn now - lets get hopping and enjoy the work of these wonderful artists!
Louise Crosbie (Scotland, UK)
Lea Kimmel (North Carolina, USA)
Claudia Neubacher (Vienna, Austria)
Asia King (Oxford, UK)
Iliane de Fockert (Elly) (Niedersachsen, Germany)
Suzanne Czosek (Illinois, USA)
Julia Stratford-Wright (Suffolk, UK)
Kristine Reynolds (California, USA)
Angelica Stark (Hudiksvall, Sweden)
Mark Gould (West Sussex, UK)
Debbie Cole (California, USA)
Jamie Martin (Oklahoma, USA)
Tobi Crawford (BC, Canada)
Wendy Price (New Jersey, USA)
Jessa Plant (Arizona, USA)
A few of the bloggers this week are new to hopping, so if you have an issue with any of the links, here's a little tip! If you get a page that says "Sorry that Page is not here" or something similar, try clicking on the header of the blog, or look for something that says Home. The hop page should be near the top of the day's posts. We will fix broken links as the day goes on, as well, so check back here if you are really lost.
The Official Rules.
Thursday, 26 June 2014
Music Is My First Love For Stampendous And DecoArt
Hi everyone. Day 4 at the blog hop which has been going on since Monday. Not visited yet? Check out these links for the full story: MONDAY - TUESDAY - WEDNESDAY
The excitement continues as we lead you on a world tour of amazing artists playing with Stampendous, DecoArt, and Princeton Artist Brushes via inspired by Willow Wolfe products together! You'll be amazed at what they've created!
To take part all you have to do is:
- Visit each blog and leave a comment
- Like Stampendous, DecoArt, Princeton Artist Brushes, and inspired by Willow Wolfe on Facebook!
- Repin our projects onto your Pinterest boards and tag us when you do (#Stampendous, #DecoArt, #PrincetonArtistBrushes, #byWillowWolfe) we'll be tracking!
What's in it for you:
- Stampendous will choose three blog posts from all the designer posts this week and then choose a winner from each to receive a prize package - Princeton Artist Brushes, through Willow Wolfe, is sending a Select 3750 Brush Set and a Catalyst Wedge, and we'll be adding a Stampendous Creative Palette so you can use all the new techniques you'll learn here this week. (America and Canada only)
- Bonus goodies are on offer for some lucky people who SHARE our Facebook posts and Pinterest Pins.
- For International commenters: DecoArt has agreed to mail out three fab Media Paint sample packages to international bloggers as well. YAY!
The Official Rules - Please read!
Here's what I've made for today's hop - hope you like it!
 |
| Partly in shadow I'm afraid as I took the photos on a very sunny day. |
.JPG) |
| I used all the DecoArt products here and something from each of the Stampendous stamp packs and the Creative Palette of course - couldn't get a clearer photo to show the paint shades, sorry. |
 |
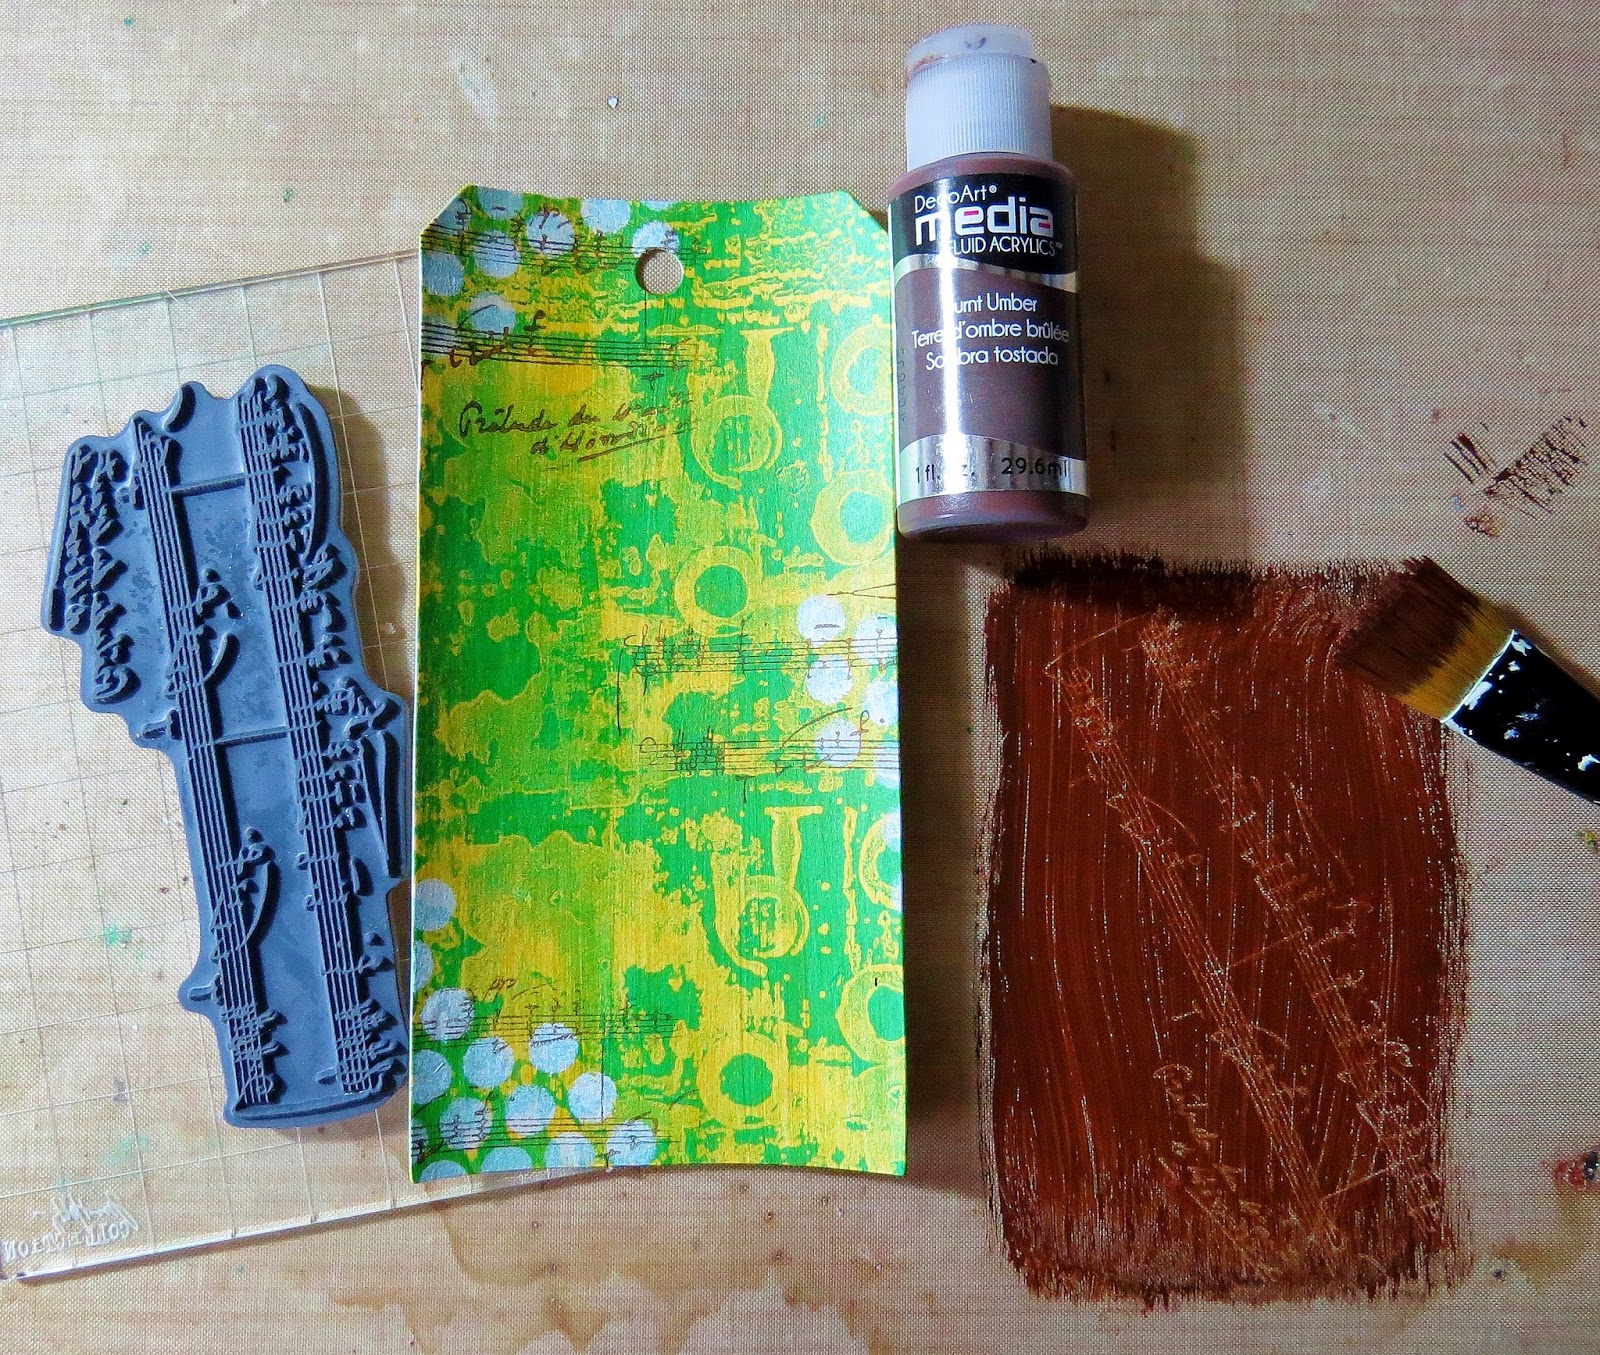
| Paint was applied to the Creative Palette with a brayer and the stamp shown was applied all over the palette. Paper was placed over the palette and carefully smoothed. When removed, the paper had the imprint of the stamp in the colour. The dry paper was glued to card then die cut into a tag shape. |
 |
| Lightly coat the tag surface with a transparent shade of DecoArt Media acrylic. Don't worry about the little bubbles. I just dry these with a heat gun and they stay flat/attached. |
 |
| Use the free stencil from the Stampendous stamp pack and apply DecoArt Translucent white acrylic (I LOVE this stuff because it's hugely versatile). I use the lightweight masking tape to hold my stencil down because otherwise, I make a mess! |
 |
| Apply in a few areas on your tag. Note that you can still see the background through the paint. |
 |
| Brush a very thin layer of your chosen colour of DecoArt Media acrylic onto a craftsheet. Gently tap chosen Stampendous stamp into the paint and apply to the tag as required. Wash the stamp straight away! Paint can be scraped off stencils but stamps are not so forgiving! |
 |
| Use another of the free Stampendous stencils to apply a large treble clef using the DecoArt Media paints shown. Dry with a heat gun. I then use a black watercolour pencil to add shadow - I don't add water to it! Note how you can still see images through the paint because I sponged them on gently and not too thick. |
 |
| Using Stazon ink, stamp some script onto a piece of acetate. Allow to dry naturally. Cut acetate so the script is at an angle. Apply to tag with double sided tape but just use tiny pieces. |
 | ||
Antique some mini clips with sandpaper, DecoArt carbon black acrylic and crackle glaze. Place on the tag to cover the small pieces of double sided tape. Make some plastic labels (or any other type!) and apply to tag. (I've used the lyrics from a John Miles track but I've changed the original from 'was' to 'is' because I always sing it incorrectly anyway!) Use a pencil to add shadow as before.
|

 |
| Put a small amount of your chosen paint/s onto a craft mat and dilute with water. |
 |
| Drag some ribbon through the colours until you are happy with the result. Scrunch up the ribbon into a ball and dry carefully with a heat gun. Soooo simple isn't it? |
What are you waiting for? LET'S GET HOPPING!!
Louise Crosbie (Scotland, UK)
Debbie Cole (California, USA)
Iliane de Fockert (Elly) (Niedersachsen, Germany)
Julia Stratford-Wright (Suffolk, UK)
Suzanne Czosek (Illinois, USA)
Kathi Rerek (New Jersey, USA)
Wendy Price (New Jersey, USA)
Tobi Crawford (BC, Canada)
Follow these links above. If any don't work, try clicking on the blog header at your destination. These will be corrected throughout the day.
Wednesday, 25 June 2014
Keepsake Box For Stampendous And DecoArt
Today is Day Three for the Stampendous, DecoArt and Princeton Brush Co. Blog Hop. (If you've missed the first two days click HERE for Monday and HERE for Tuesday.)
Here's what Stampendous have to say:
WELCOME - to our weeklong blog collaboration with DecoArt Paints, Princeton Artist Brushes, and inspired by Willow Wolfe. If you missed Monday's excitement, here's the LINK.
DecoArt creates so many fantastic paint products, our team was excited to try so many! We know you'll be stunned when you see what these great products add to your stamping! When you combine them with Princeton Artist Brushes and Catalyst Wedges used on the Stampendous Creative Palette, well WOW!
To take part all you have to do is:
What's in it for you:
And finally, here's what I made for today's hop, hope you like it!
Thanks again for your visit and your comment. It's always good to know someone is having a look!
Here's what Stampendous have to say:
WELCOME - to our weeklong blog collaboration with DecoArt Paints, Princeton Artist Brushes, and inspired by Willow Wolfe. If you missed Monday's excitement, here's the LINK.
DecoArt creates so many fantastic paint products, our team was excited to try so many! We know you'll be stunned when you see what these great products add to your stamping! When you combine them with Princeton Artist Brushes and Catalyst Wedges used on the Stampendous Creative Palette, well WOW!
To take part all you have to do is:
- Visit each blog and leave a comment
- Like Stampendous, DecoArt, Princeton Artist Brushes and inspired by Willow Wolfe on Facebook!
- Repin our projects onto your Pinterest boards and tag us when you do (#Stampendous, #DecoArt, #PrincetonArtistBrushes, #byWillowWolfe) we'll be tracking!
What's in it for you:
- Stampendous will choose three blog posts from all the designer posts this week and then choose a winner from each to receive a prize package - Princeton Artist Brushes, through Willow Wolfe, is sending a Select 3750 Brush Set and a Catalyst Wedge, and we'll be adding a Stampendous Creative Palette so you can use all the new techniques you'll learn here this week. (America and Canada only)
- Bonus goodies are on offer for some lucky people who SHARE our Facebook posts and Pinterest Pins.
- For International commenters: DecoArt has agreed to mail out three fab Media Paint sample packages to international bloggers as well. YAY!
And if that's not enough:
Would you like to own this little beauty designed and made by the amazingly talented Andy Skinner using DecoArt Media fluid acrylic paints and mediums?
Just leave a comment on each blog in the hop and the winner will be announced on Friday.
|
|
 |
| A tiny little matchbox sized keepsake box. I found this really challenging because the piece is so small and I wanted to pack it full of techniques - well, some techniques at least! |
 |
| These are the products I used from Stampendous and DecoArt to create my little box - for some reason, I forgot to take photos as I went along this time! I used the bottom two stamps from the pack for my box - that means I have one more to play with! If you look carefully, you can also see the free stencil in the pack - still with dried paint on I'm afraid! |
 |
| The box is diecut using a piece of card which has a monoprint added from the Stampendous plate. The monoprint was made using DecoArt Media range acrylics (as previously shown). Top and back view shown. |
 |
| This side view shows the box closure mechanism made from thick jute string with rusty wire I wrapped around it. You simply pull out the lid flap to open the box. The white lines on the design are where the stamp was applied to the Creative Palette - so clever! |
 |
| The opened box reveals the inside which has the same altered monoprint on the base. Sorry about the fingers on view - it wouldn't stay open for the camera! The monoprint was made by adding colour to the plate with a brayer then stamping my chosen stamps into the surface. The paper is then laid on top, smoothed out and hey presto - you have a monoprint ready for to be altered. |
 |
| The mono print can clearly be seen here in the background. The circles were altered using either a black pencil or some DecoArt Media range Quinacridone Gold paint. Machine stitching was added around the larger circles. Finally a coat of DecoArt Crackle Glaze to finish. The tiny flowers are punched from scraps of the print, crackle glazed then rubbed with carbon black paint. Tiny black gems complete the flowers. |
 |
| The free stencil was again put to good use for applying the embossing powder. Versamark ink was applied through the stencil followed by the embossing powder. Gently heated from below then a final coat of crackle glaze was applied as before. |
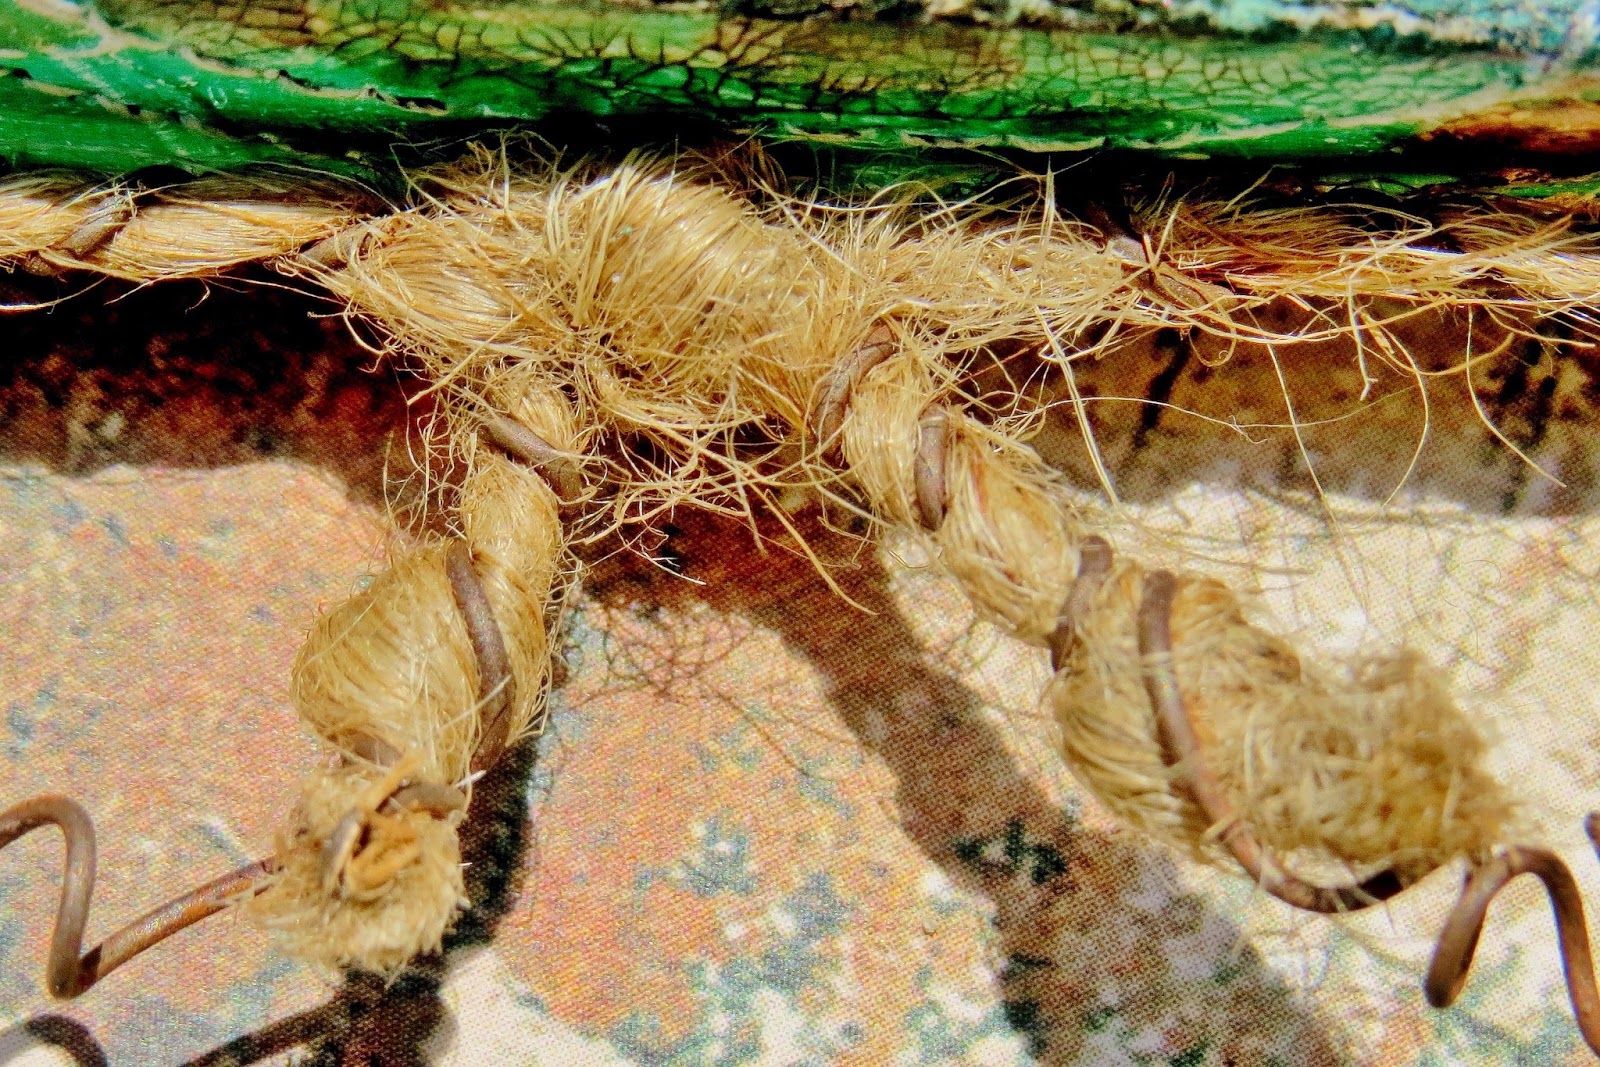 |
| The jute string was tied in a knot at the front of the box. The rusty wire extends from the ends of the sting and some curl was added to them to complete the look. |
What would you keep in your little keepsake box?
Now it's your turn to hop around part of the world and look at the fabulous inspiration on display. Here's your list, let's get started:
DecoArt Blog
Stampendous Blog
Claudia Neubacher (Vienna, Austria)
Kristine Reynolds (California, USA)
Iliane de Fockert (Elly) (Niedersachsen, Germany)
Julia Stratford-Wright (near London, UK)
Julie Robertson (UK)
Jamie Martin (Oklahoma, USA)
Debbie Cole (California, USA)
Shannon Moyer-Szemenyei (Canada)
Tamiko McCurry (Illinois, USA)
The Official Rules are here. Please take a moment to read them. Broken links will be corrected during the day so do call back. If a link doesn't show the post, try clicking on the blog heading.Thanks again for your visit and your comment. It's always good to know someone is having a look!
Subscribe to:
Posts (Atom)