Sunday, 1 December 2013

Two Posts For The Price Of One Today: Our Creative Corner. . . . . . . . . A Very Vintage Christmas


Hello everyone, I'm so glad to be back in blogland after the trials and tribulations of 'the move'! My new craft room is set up and I intend to start using it a lot over the coming months!!

This is the first of two posts today - not my usual style but hope you can stick with me!

The challenge at Our Creative Corner this month is set by our illustrious leader Laura and what a wonderful challenge it is! Here's what Laura has come up with for you:

  For this challenge we are abandoning traditional Christmas colours and are giving Christmas a Vintage tone. No reds, no greens, just neutrals.

     The challenge here is to use a neutral palette....so think about shades of creamy hot chocolate, glistening white snow, rich dark sherry and mince pies, ivory candles, rustic wooden logs, roasting chestnuts and brown paper packages tied up with string!

    This Christmas we want you to make anything you like - Cards, ATC's, Tags, Scrapbooking, journals, Gifts, Altered art......anything you like....but please use only neutral colours from ice white, through to ivory and cream, beige to dark brown and black. You can also use metal embellishments, metal paints and stains. 

Please Note - Your creation does NOT have to be 'Vintage style' - We would love to see Christmas creations in any style, but please keep to a neutral colour scheme.

How amazing is that for a challenge?! I couldn't wait to join in the fun and if you want to see what my very talented teamies have come up with, please click here.

Here's my offering for Laura's challenge this month:

(I should warn you that this post is picture heavy - as always!)

I decided to use some wooden baubles I found online. I have altered both the front and the reverse of each wooden shape, hence the number of photos! (Sorry!).


Side One
Side Two
Side One
Side Two
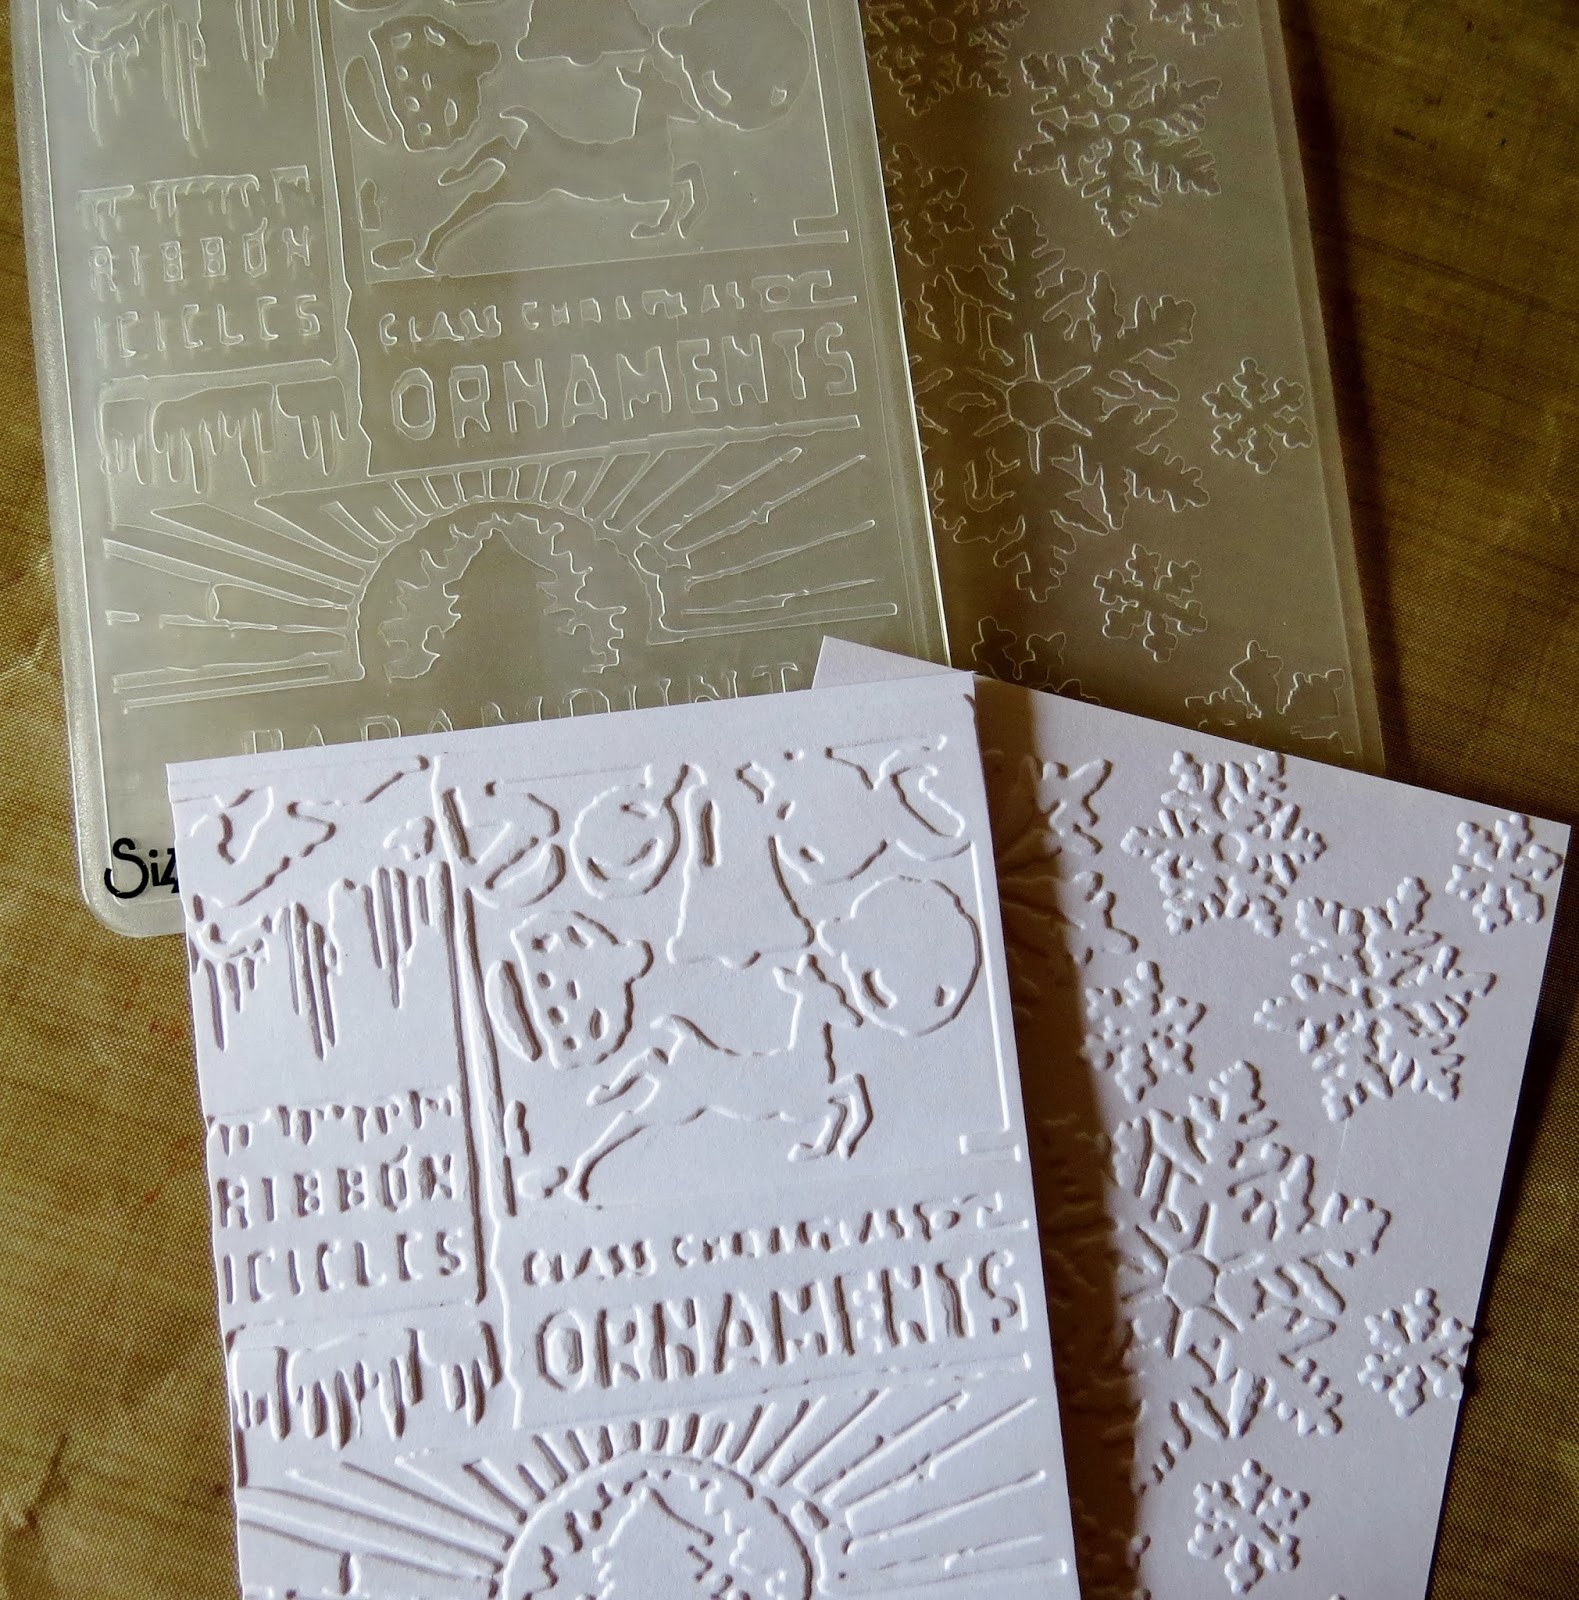
Two pieces of card were embossed in seasonal folders.
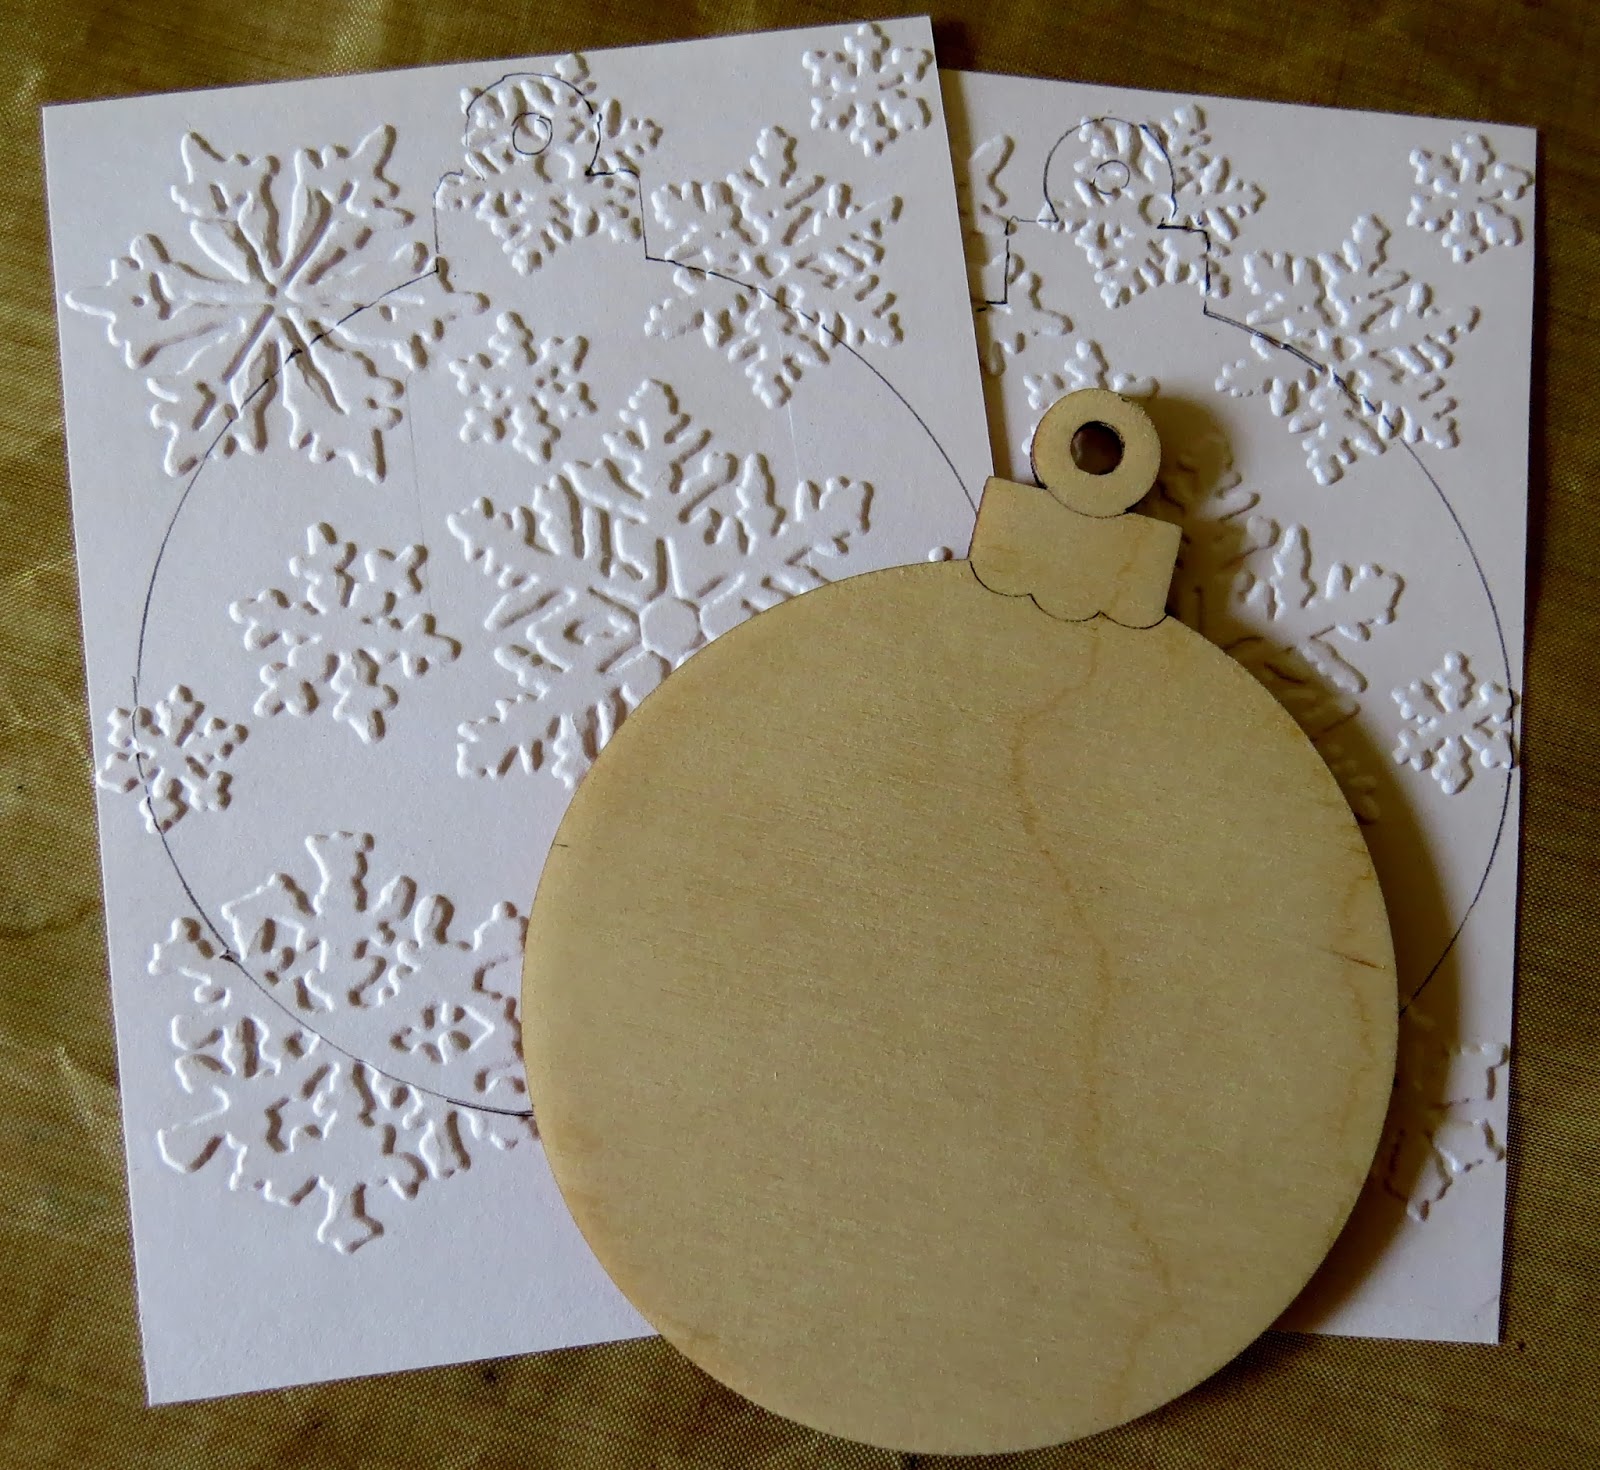
Use the wooden bauble as a template to draw the shape onto the embossed card.
Carefully cut out shapes.
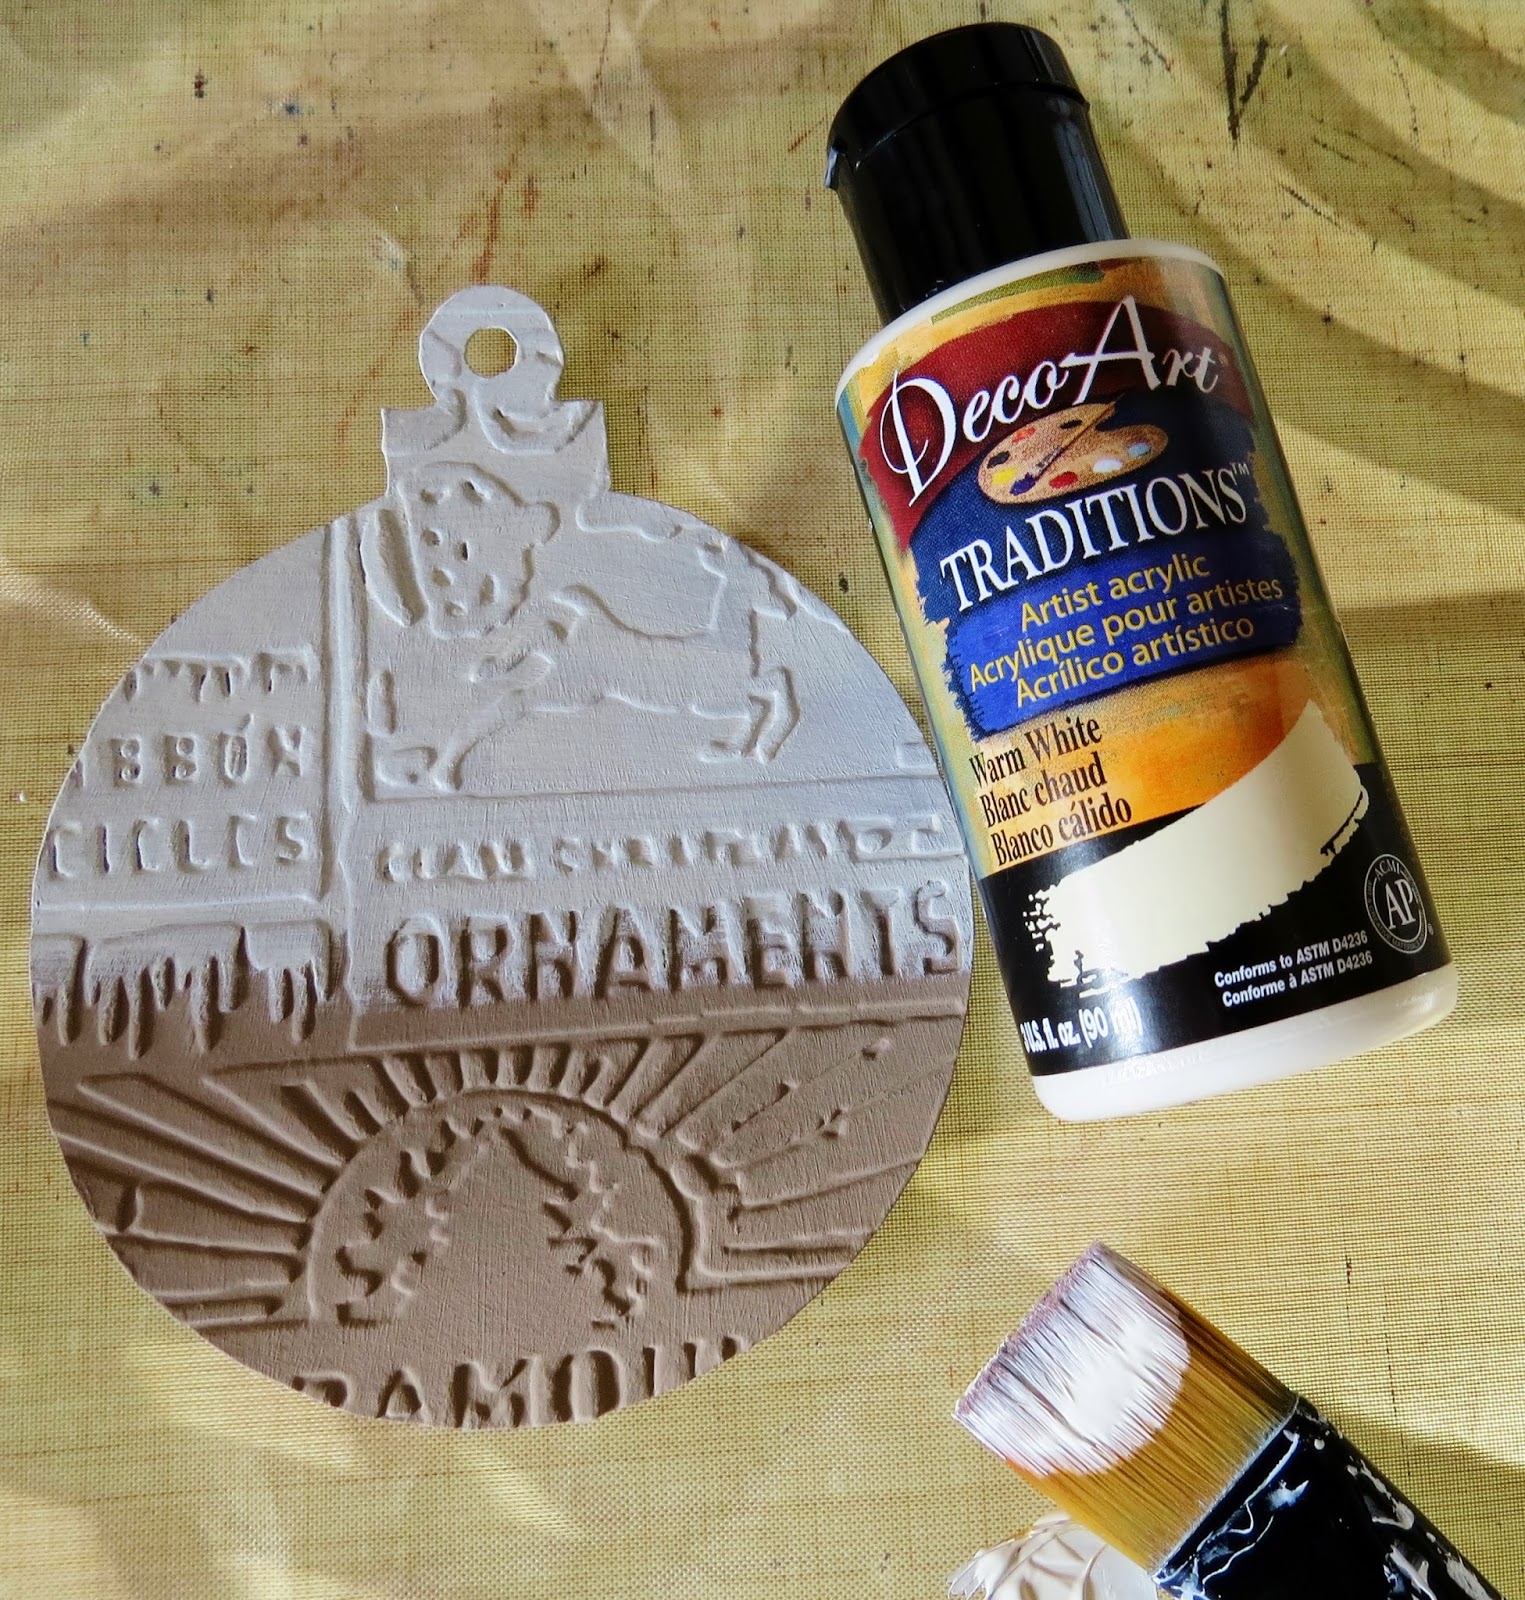
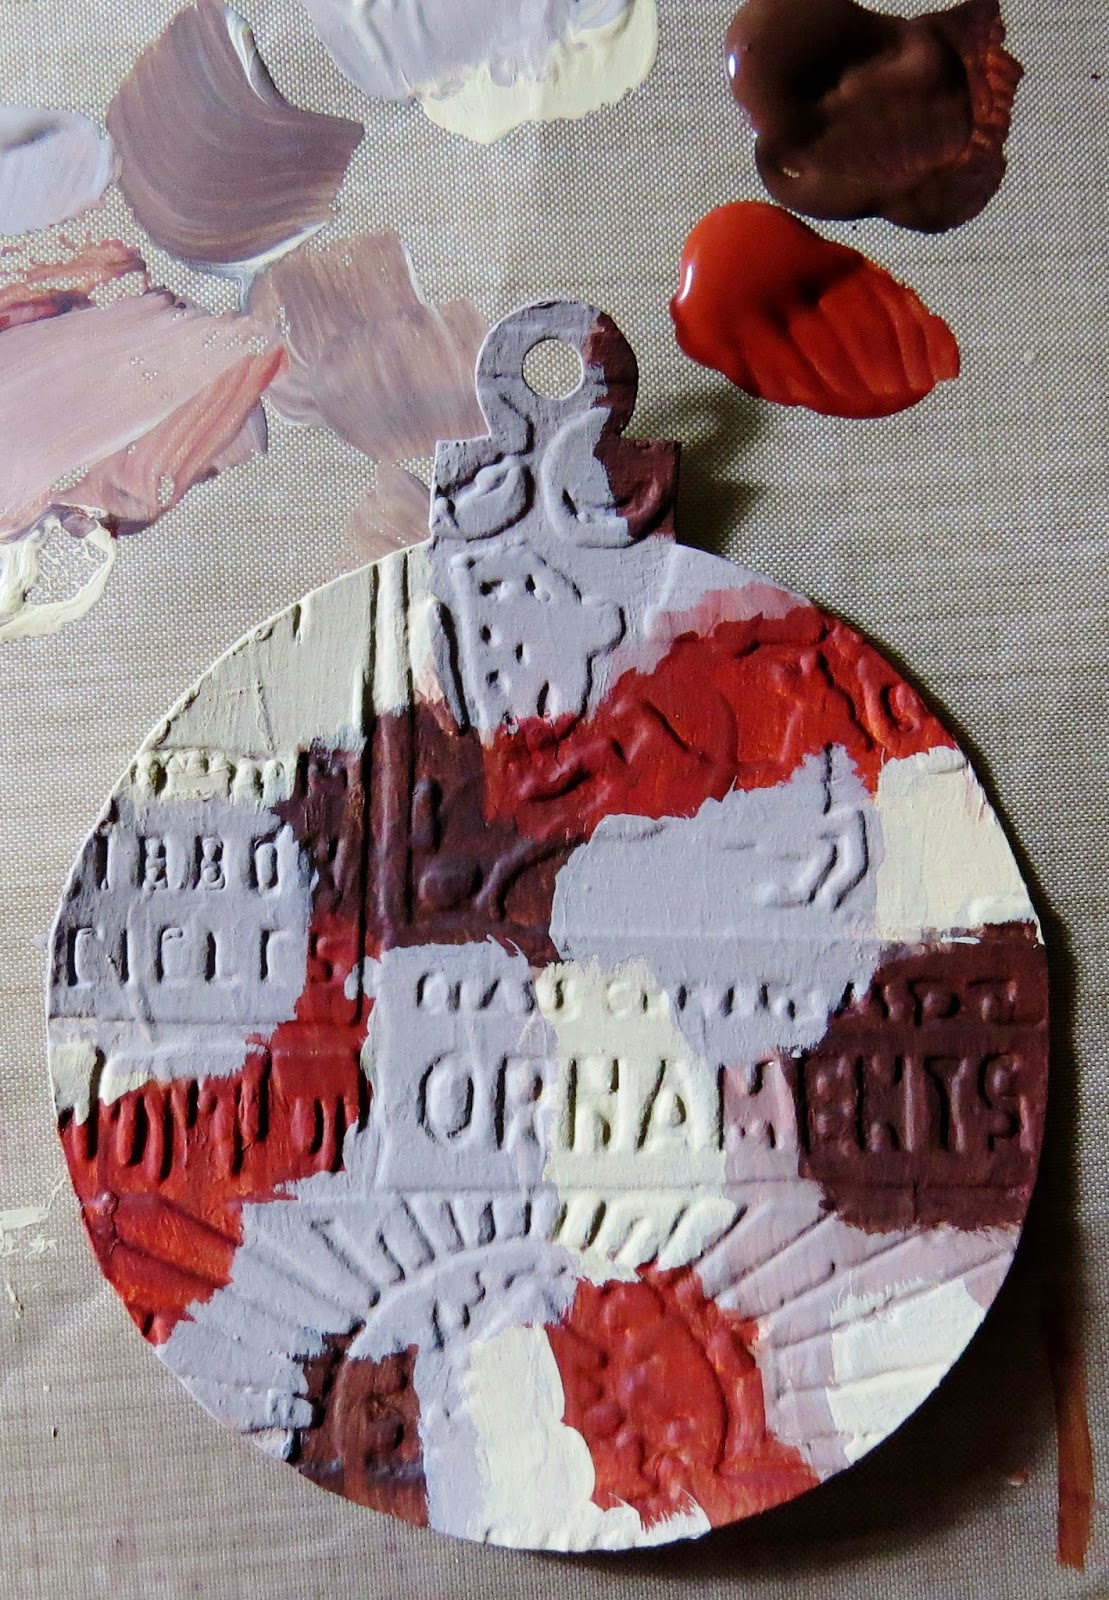
Paint one bauble shape with chosen colours of Traditions paint. Add the same colour/colours to the edges of the wooden bauble - this ensures that no white bits show later!
Paint both card and wood shapes with two coats of DecoArt gesso to seal.
Using a second paint colour, paint over the previous coat and dry.
When the paint is dry, lightly sand the surface to expose the previous colour.
Make a wash with Traditions Quin gold and carbon black and use to age the bauble.
I wasn't keen on the pale look so I added a wash of Traditions carbon black.
Some DecoArt metallic lustre in two different shades was randomly added with cut and dry foam then buffed.
To finish this bauble face, some wooden glittery trees were antiqued with a Krylon pen and some Traditions raw umber paint. 


After buffing the DecArt lustre paste, some rusty wire and a rusty bell were attached. The bauble can be hung using the rusty wire loop which is made simply by twisting the wire to the size required.


 Three more bauble faces were made using a variety of techniques - I fear you would fall asleep if I uploaded all the pictures! Here are a few for your information - if you need any extra details, just drop me an email and I'll happily explain.

The second face was achieved using DecoArt Traditions in a variety of colours. When dry a quin gold wash was applied. Next some black DecoArt Americana was swiped over, allowed to dry for a time and then partially removed with a baby wipe.
For this bauble, embossed card was used again over the wooden shape. DecoArt Traditions paint in warm white was used to give the shape two coats. DecoArt metallic lustre was applied to the raised sections  to highlight the snowflakes. Finally DecoArt two step was applied. When dry raw umber Traditions paint was rubbed into the cracks and the excess removed with a baby wipe. Rusty wire and bells were used to finish the look.


The remaining side also features embossed card which was painted with Traditions in a shade of white then covered with burnt umber Traditions paint. When dry, the surface was lightly sanded to reveal the white shade. Some versamark ink was stencilled through sequin waste followed by gold shimmer powder. When set, the bauble was finished with a coat of DecoArt Triple Thick glaze. A wooden snowflake was embossed with powder in a shabby white shade.


I tried to get these three pictures in a line but gave up - blogger can be so annoying at times!

That's enough from me today! I've enjoyed making these baubles and will certainly use them somewhere this Christmas. Perhaps I could add them to another project which is coming up to today. Why not pop back later and have a look?

Your turn now! Before you start, pop over to Our Creative Corner and have a peek at the wonderful work from my very, very talented teamies - you won't be disappointed!


Friday, 1 November 2013

Steampunk Tic Tac Toe At Our Creative Corner

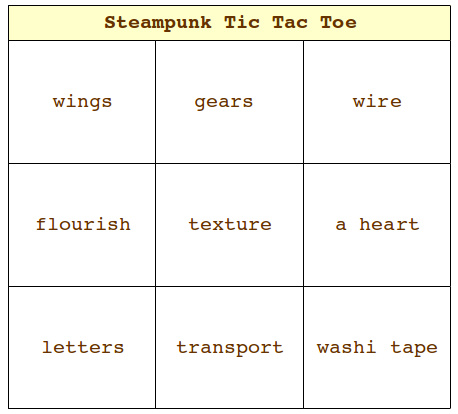
Hello Everyone. I'm taking a break from unpacking boxes this time to bring you my offering for the new challenge at Our Creative Corner. The challenge this month is a Steampunk Tic Tac Toe hosted by the Queen of Steampunk, Claudia. Here's the grid you can choose your elements from:


You can choose any straight line which is horizontal, vertical or diagonal and as long as you include the three chosen elements, you can, of course, include any of the others if you wish. Please make sure you let us know which line you are choosing won't you? 

Claudia says that we can go full on Steampunk or simply ensure that some Steampunk elements are included such as wings, gears etc. All the details for the challenge are over on the blog and if you would like to read more, click here.

For my piece, I decided to make a small travelling box for a Steampunk gentleman. Small valuable items could be kept in the travelling box which is small enough to hide in the gentleman's luggage or in a deep leather trench coat pocket! I have chosen the line: Gears; Texture and Transport. I have to let you into a secret here: originally, I was going to do the top line with wings, gears and wire but in my haste to complete my project before I moved house, I forgot the wire!! When I looked at my project against the above grid, I realised my mistake and had to improvise with my interpretation of the 'Transport' element! I do hope Claudia is happy with that!

Here's my Steampunk Gentleman's Travelling Box:

I altered an old box from a car boot sale - as usual, I forgot to take a photo of the 'before' view! 
DecoArt Traditions burgundy paint was applied after the box had been prepared with two coats gesso and sanded between each coat.
Images of steampunk gears were stamped onto the dry paint with black archival ink. This needs to be thoroughly dry before applying any further mediums to the surface.
DecoArt two step crackle was then applied over the box (excluding the base). I made sure the layers were extra thick and allowed it to dry naturally. Finally, carbon black Traditions paint was rubbed all over the box then cleaned away with a baby wipe. This allows some of the paint to remain in the cracks but removes it from the unbroken areas. 
Various die cuts (including the gears for my tic tac toe choices) were made from both plain and textured grunge paper. Various sized half pearls were added to imitate rivets.  Each diecut was given two coats of gesso followed by two coats of silver paint. When dry, carbon black Traditions was lightly applied to each die cut then wiped back with a baby wipe. Finally, a graphite stick was used to highlight certain areas.  


The thin strips of grunge paper are the scraps from around the edge of pre-cut grunge paper shapes - much easier than cutting them myself!
On the die cut gears, a metal Ideaology gear was added for greater depth - it was painted in exactly the same way as the grunge paper gears.


The inside of the box was given an antiqued finish using various types of paint on a gessoed base. 
The bubbling you can see in this image was a happy accident. I was trying to dry things in haste (as you do!) and the surface started to bubble - shock horror! Once I'd calmed down, I decided that I rather liked the effect as it added to the aged appearance of my box - just as well really!
The 'studs' you see at the ends of the grunge paper strips are the waste formed when a gear is die cut. I thought these would be more suitable for the sides of the box than the half pearls used elsewhere.

Your turn now to get all Steampunked for Our Creative Corner! Can't wait to see what you make! Don't forget to pop over to see the creations made by my hugely talented teamies and on the 15th November the second team will be offering even more inspiration for you.

For those who follow my recent trials and tribulations of moving house: we have now moved into our beautiful house. The unpacking of boxes goes on, along with cleaning and trying to find lost items! Hopefully, tomorrow will see our internet installed so I won't have to rely on my phone as an internet connection! Even better, we're having a fridge delivered - having been without for a week, I wonder what on earth people did before they were invented! 

My craft room is still a sea of boxes but watch this space for some before and after pictures as I set it up!


Monday, 21 October 2013

Going Dutch For DecoArt. . . . . .

Hello Everyone. Thought I should announce some fantastic news formally here, even though some of you are already aware of the wonderful opportunity I've been given.

In the Spring, I was approached and asked to be part of a mixed media Design Team for the amazing company DecoArt. Primarily the approach was made by the hugely talented Andy Skinner, so how pleased was I?!! Bit of an understatement really - I was over the moon, dancing around and generally acting even more mad than usual! I am on an International Design Team and I'm sure you will know my other very talented team mates. You will find the blog here so please do go and look at the wonderful work by the team.

DecoArt manufacture a comprehensive range of fabulous products from paints for different surfaces to mediums for endless uses including wonderful mixed media pastes and finishes. Having used a number of their products on various projects, I can certainly vouch for their quality and ease of use.

I have been working on a project for quite some time now and at long last I can share it with you. As usual, it features one of my many charity shop finds - I'm addicted to rummaging in them I'm afraid!

I found a pair of wooden Dutch clogs and just had to have them. I think they are probably a tourist piece but they conjured up all kinds of ideas for me! One of the best things about having a pair of these clogs is that even though I've used one, I still have one more to play with!

This is how the clog looked before I started: (warning: this post is picture heavy!)

Sadly, I can't quite fit my whole foot into the clogs - otherwise I could have modelled the finished project for you!
Both clogs were a bit rough round the edges but nothing that a little sandpaper couldn't handle.
One half of the pair completed and looking so much better!
Die cuts, ribbon, paint, cork clay, twine, crackle texture paste and rusty wire amongst other things have been used to create the makeover.
The clog was heavily sanded to smooth the surface and remove the pattern transfers.
The front of the clog was then built up using DecoArt Texture Crackle to create a more pointed effect. 
Various die cuts, crispy ribbon, googly eyes, stick on pearls, cork clay and even some curled up painted tyvek was added to create interest and texture. 
Once everything was dry, two coats of gesso were applied. DecoArt gesso is fabulous. Thick, creamy and reasonably priced it can be used straight from the jar or watered down according to the end use.
All the die cuts were  given two coats of gesso before being glued into position.
The colours above were all used to finish the clog in varying degrees of depth. DecoArt Traditions paints have a high concentration of pigment and are fab to work with. 
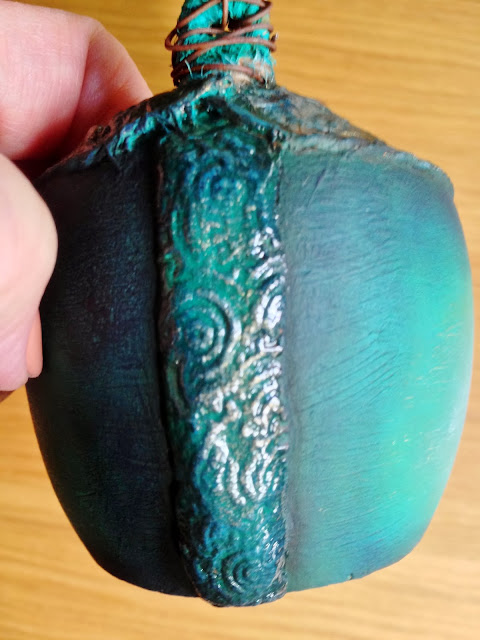
Blue Green Light and Aquamarine Traditions paints were the two main colours used as the base on the clog. Prussian Blue was then used to add shading to the surface. Warm white was later added to highlight certain areas. If you look carefully, you can see that some twine was added around the edge of the cork clay to tidy up the join. The cork clay was given additional texture by pushing random stamps into it. This gives depth and interest.
Slightly blurred but you can see the imprint of  a swirl stamp pushed into the clay in this image. This clay was coloured with a combination of the colours shown. Lastly a dry brush coat of DecoArt Metallic gold was added followed by some Triple Thick Gloss Glaze.
The crispy ribbon was dry brushed with various colours to highlight the area underneath. Finally, a coat of DecoArt Metallic paint in Venetian Gold was dry brushed over the ribbon and other areas on the project.

This part of the project was made from die cuts, 'googly eyes' and self adhesive pearls. The orange tones were created by adding a wash of Quinacridone Gold Traditions paint. If you buy one colour of Traditions I would buy this one for it's versatility. I used it here to bring definition and to work with the other colours as a complementary colour. It's fabulous for aging projects too.
Both clogs were held together with string through a hole. I wanted to decorate this hole so added a bead to both the inside and out. Like the die cuts, pearls and googly eyes, the beads were given a coat of Triple Thick Gloss Glaze.
This die cut flower was left over from a previous project. I liked the combination of the flower shades and those on the clog so decided to add it. The flower was coloured with DecoArt Americana, stamped with versamark  dusted with gold mica powder then finished with DecoArt Perfect Crackle. Some coiled rusty wire finished the look.


A metal eye was added to the back of the clog. The ends of the twine from the cork edging were secured around it, painted and then bound with more rusty wire.
I just love all these colours together!

The gold edging on the die cuts was achieved using DecoArt Metallic Lustre added with a paint brush and then buffed with a soft cloth. You can see how the Prussian Blue was used as a shadow here.

The shading with the Prussian Blue Traditions shows up well here. I also love how the googly eyes turned out with their multi layers of paint and Triple Thick Gloss Glaze.

I really had fun playing with the products on this project. It has been time consuming but great to go back to in between other projects and the dreaded packing! Thank you Andy Skinner and DecoArt for giving me this wonderful opportunity too!!

My lovely house is now in complete disarray and this time next week I will be living in my new house - really excited now but sad too to leave somewhere that I have enjoyed living for over 10 years. Please don't forget me in the meantime! I know my blogging has been erratic but I'm not quick enough to make lots of projects and line them up for scheduling (combine that with packing and sorting more than 10 years of 'stuff'' remember!!)  - I so admire people who can do this! See you all soon.